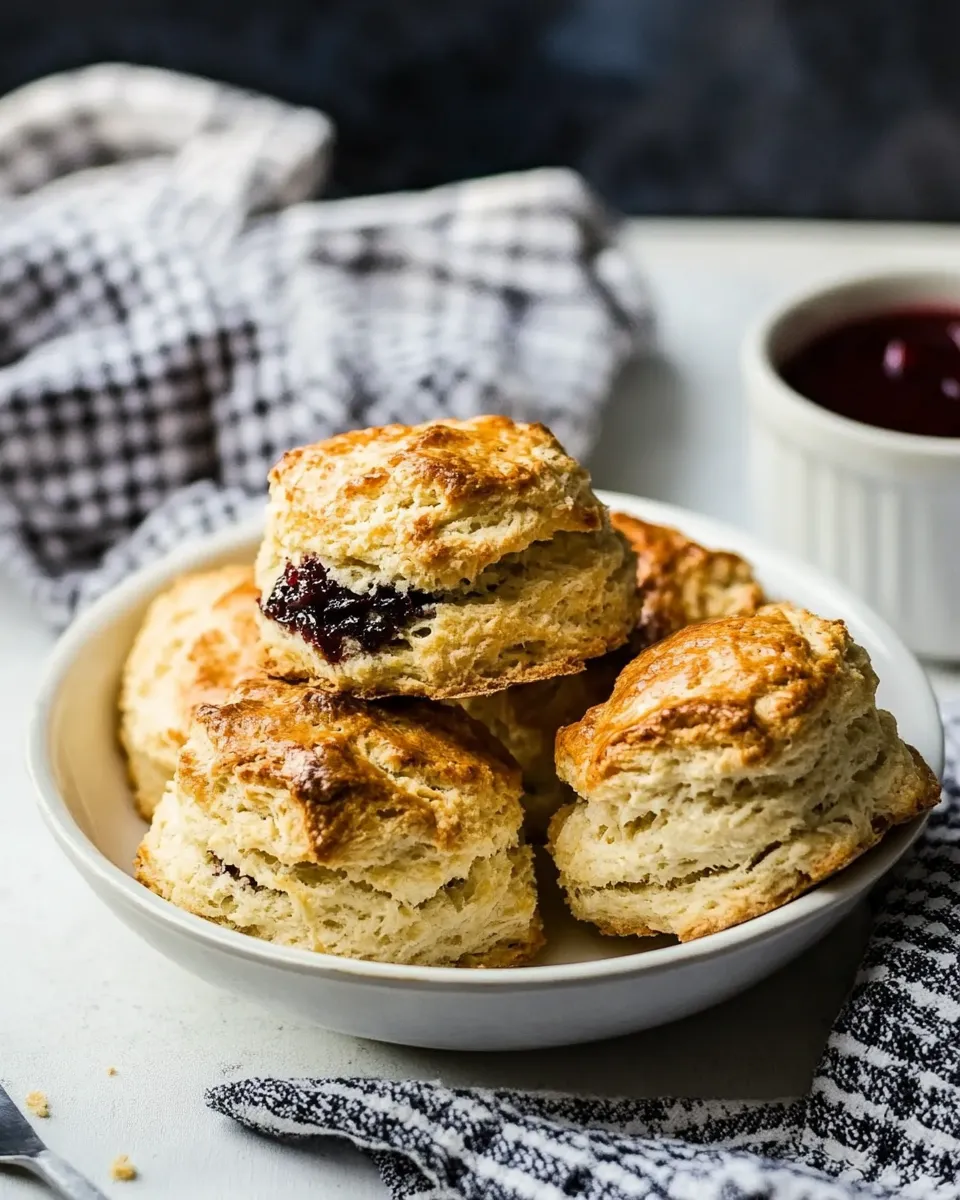
Irish Scones
If you’ve ever had the pleasure of enjoying a freshly baked Irish scone, you know why they are loved by so many. These delightful pastries are light, fluffy, and bursting with flavor, making them an ideal treat for breakfast, afternoon tea, or a cozy evening snack. In this article, we’ll explore the art of making Irish scones, from why they are worth your time to helpful tips for perfecting your baking skills.
Why Irish Scones is Worth Your Time

Irish scones are not just any baked good; they are a tradition that brings warmth and comfort to the table. The combination of simple ingredients creates a tender, moist texture that is hard to resist. Whether enjoyed plain or adorned with clotted cream and jam, these scones are a celebration of Irish baking culture. Plus, they are incredibly versatile! You can customize them with your favorite dried fruits, spices, or even zesty flavors.
Taking the time to craft these delightful treats will not only impress your family and friends, but it will also fill your home with the irresistible aroma of baked goodness, making your kitchen feel like a cozy bakery.
The Essentials
To create the perfect Irish scones, you’ll need a few essential ingredients. Here’s a detailed look at what you will need:
- 4 cups all-purpose flour – This is the base of your scones, providing structure and texture.
- 3 tablespoons sugar – A touch of sweetness that balances the flavors.
- 2 tablespoons baking powder – The leavening agent that makes your scones rise.
- 1 tablespoon salt – Enhances the overall flavor of the scones.
- 1 cup cold unsalted butter – Cut into cubes, this adds richness and flakiness.
- 1 cup dried currants (or raisins) – These fruity additions bring sweetness and texture.
- 4 large eggs (beaten) – Provides moisture and binds the ingredients together.
- 1 cup heavy cream – Adds richness and creates a tender crumb.
- 1 egg (for egg wash) – Gives your scones a beautiful golden finish.
What’s in the Gear List
Before diving into baking, make sure you have the right tools on hand. Here’s a quick gear list:
- Mixing bowls – For combining your dry and wet ingredients.
- Baking sheet – To bake your scones evenly.
- Parchment paper – To prevent sticking and for easy cleanup.
- Pastry cutter – For cutting in the butter into the flour.
- Whisk – To blend eggs and dry ingredients smoothly.
- Rolling pin – For rolling out your dough, if desired.
- Cookie cutter or knife – To shape your scones.
Stepwise Method: Irish Scones
Now that you have everything ready, let’s get started on making the perfect Irish scones. Follow these steps for delicious results:
Step 1: Preheat the Oven
Preheat your oven to 400°F (200°C). This ensures that your scones bake evenly and achieve that golden crust.
Step 2: Combine the Dry Ingredients
In a large mixing bowl, whisk together the all-purpose flour, sugar, baking powder, and salt until well combined.
Step 3: Cut in the Butter
Add the cold, cubed butter to the dry mixture. Using a pastry cutter or your fingertips, work the butter into the flour until the mixture resembles coarse crumbs. This step is crucial for achieving a flaky texture.
Step 4: Add the Currants
Gently fold in the dried currants or raisins, ensuring they are evenly distributed throughout the mixture.
Step 5: Mix the Wet Ingredients
In a separate bowl, whisk together the beaten eggs and heavy cream.
Step 6: Combine Wet and Dry Ingredients
Pour the wet mixture into the dry ingredients. Using a spatula or your hands, mix until just combined; be careful not to overwork the dough, as this can lead to tough scones.
Step 7: Shape the Dough
Turn the dough out onto a lightly floured surface. Gently pat it into a circle about 1 inch thick. You can also use a rolling pin if you prefer a more even thickness.
Step 8: Cut the Scones
Using a cookie cutter or a sharp knife, cut the dough into triangles or rounds based on your preference.
Step 9: Prepare for Baking
Place the scones on a baking sheet lined with parchment paper. Brush the tops with the beaten egg to give them a lovely golden finish while baking.
Step 10: Bake
Bake the scones in your preheated oven for 15-20 minutes, or until they are golden brown and a toothpick inserted into the center comes out clean.
Step 11: Cool and Serve
Once baked, allow the scones to cool slightly on a wire rack. Serve warm with butter, clotted cream, and your favorite jam for an authentic experience.
Spring to Winter: Ideas

Irish scones are incredibly adaptable. Here are some ideas to match the seasons:
- In spring, add fresh lemon zest and poppy seeds for a refreshing flavor.
- During summer, consider incorporating fresh berries like blueberries or raspberries.
- In autumn, add warming spices like cinnamon and nutmeg, or mix in some pumpkin puree.
- For winter, try dark chocolate chips or orange zest for a festive twist.
Troubles You Can Avoid
Baking can sometimes be tricky, but here are a few common issues to watch out for:
- Overmixing the dough can lead to tough scones; mix until just combined.
- Using warm butter instead of cold will affect the texture. Ensure your butter is cold and cut into cubes.
- Not preheating your oven can result in uneven baking. Always preheat for consistent results.
- Skipping the egg wash can lead to pale scones. Don’t forget this step for that beautiful golden color!
Make Ahead Like a Pro
Want to enjoy fresh scones without the last-minute rush? Here’s how to prepare ahead of time:
You can prepare the dough in advance and refrigerate it for up to 24 hours. When ready to bake, simply roll out the dough and cut the scones, then follow the baking instructions. Alternatively, you can freeze the unbaked scones. Place them on a baking sheet to freeze individually, then transfer them to a freezer bag. When you’re ready to bake, no need to thaw; just add a few extra minutes to the baking time.
Irish Scones Q&A
Can I use whole wheat flour instead of all-purpose flour?
Yes, you can substitute whole wheat flour for all-purpose flour, but your scones may have a denser texture. A blend of both can yield the best results.
What can I use instead of currants?
If you don’t have currants, raisins, dried cranberries, or even chopped dried apricots work well as alternatives.
Can I make these scones dairy-free?
Yes! You can substitute the heavy cream with a non-dairy alternative like coconut cream or almond milk, and use vegan butter instead of regular butter.
How do I store leftover scones?
Store any leftover scones in an airtight container at room temperature for up to two days, or in the refrigerator for up to a week. They can also be frozen for longer storage.
To complement your Irish scones, consider these delightful desserts:
Bring It Home
Making Irish scones is a delightful journey that brings together simple ingredients and a touch of love. With each batch, you’ll find yourself refining your technique, discovering new flavor combinations, and creating cherished moments around the table. So, roll up your sleeves, gather your ingredients, and get ready to indulge in the warmth and richness of homemade Irish scones. Enjoy the process as much as the delicious results!

Irish Scones
Ingredients
Equipment
Method
- Preheat your oven to 400°F (200°C).
- In a large mixing bowl, whisk together the all-purpose flour, sugar, baking powder, and salt until well combined.
- Add the cold, cubed butter to the dry mixture. Using a pastry cutter or your fingertips, work the butter into the flour until the mixture resembles coarse crumbs.
- Gently fold in the dried currants or raisins.
- In a separate bowl, whisk together the beaten eggs and heavy cream.
- Pour the wet mixture into the dry ingredients. Mix until just combined; avoid overworking the dough.
- Turn the dough onto a lightly floured surface and gently pat it into a circle about 1 inch thick.
- Using a cookie cutter or a sharp knife, cut the dough into triangles or rounds.
- Place the scones on a baking sheet lined with parchment paper. Brush the tops with the beaten egg.
- Bake for 15-20 minutes, or until golden brown and a toothpick inserted comes out clean.
- Allow the scones to cool slightly on a wire rack and serve warm with butter, clotted cream, and jam.
Notes
- You can prepare the dough in advance and refrigerate it for up to 24 hours.
- Freeze unbaked scones individually and bake from frozen, adding extra time.
- For a dairy-free option, use coconut cream and vegan butter.