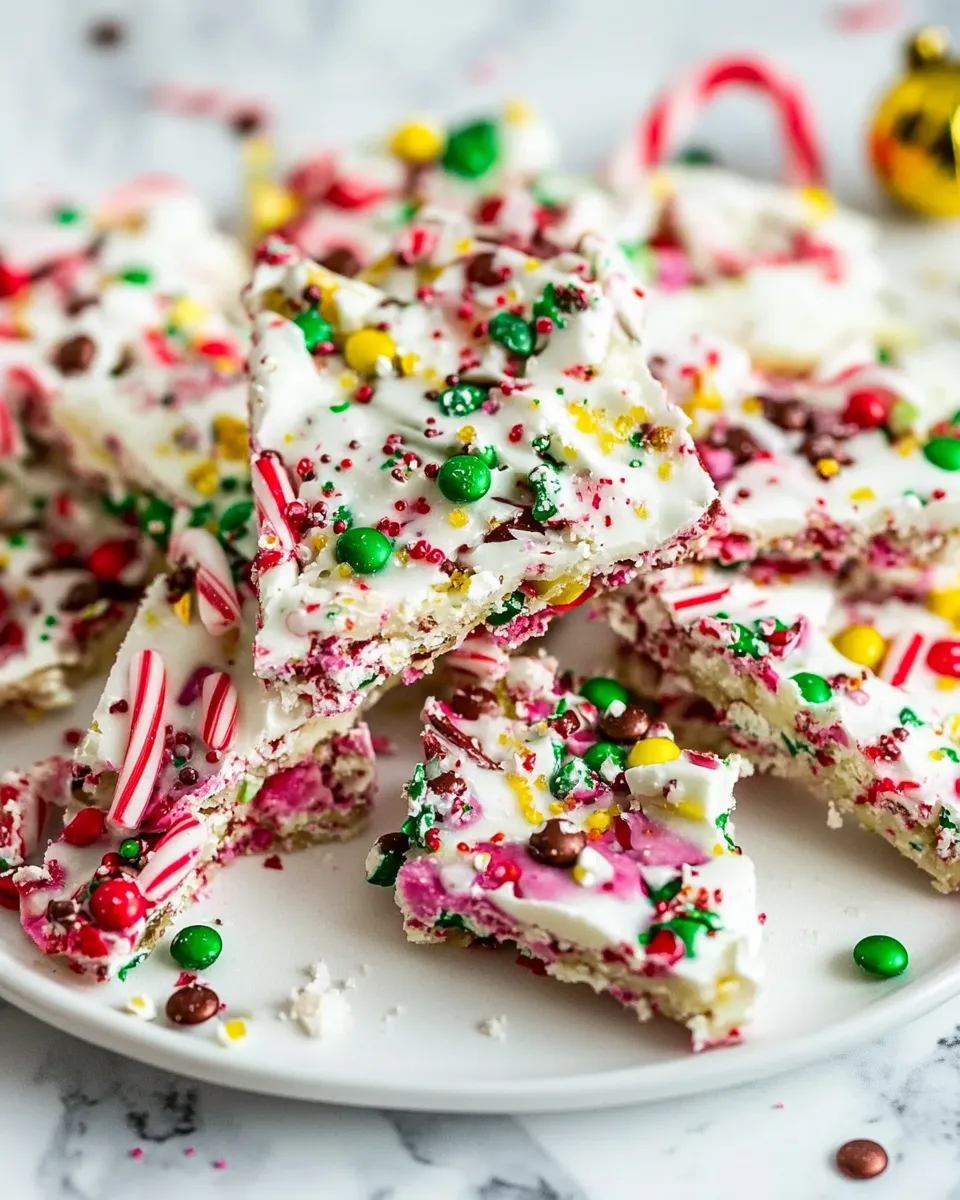
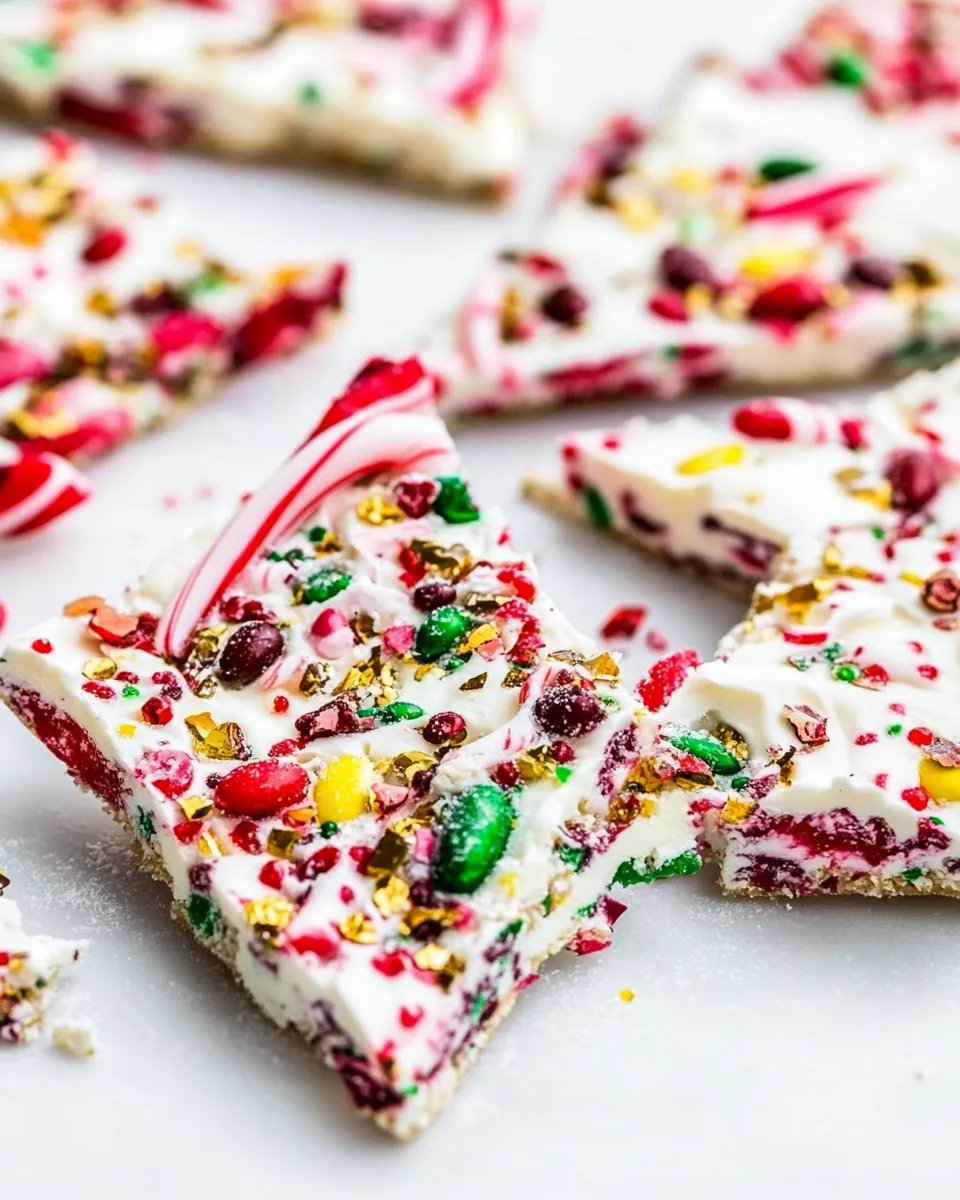
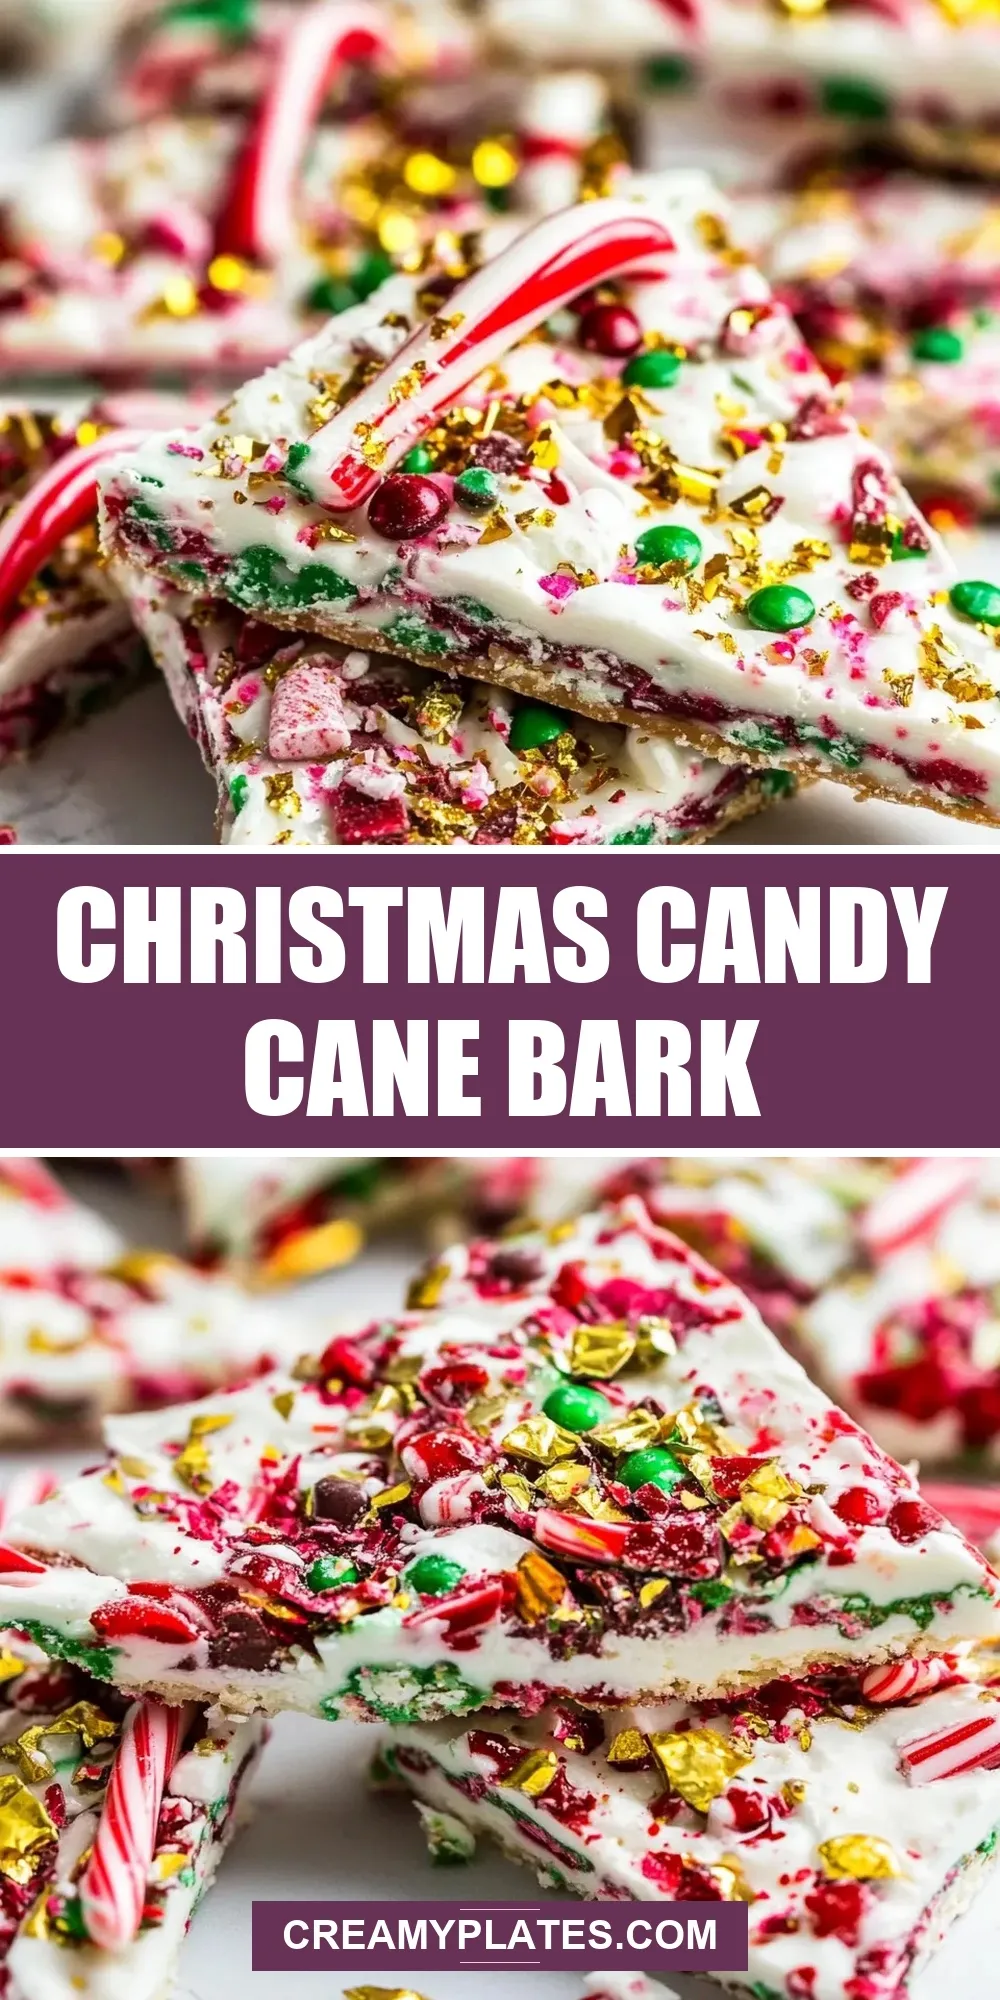
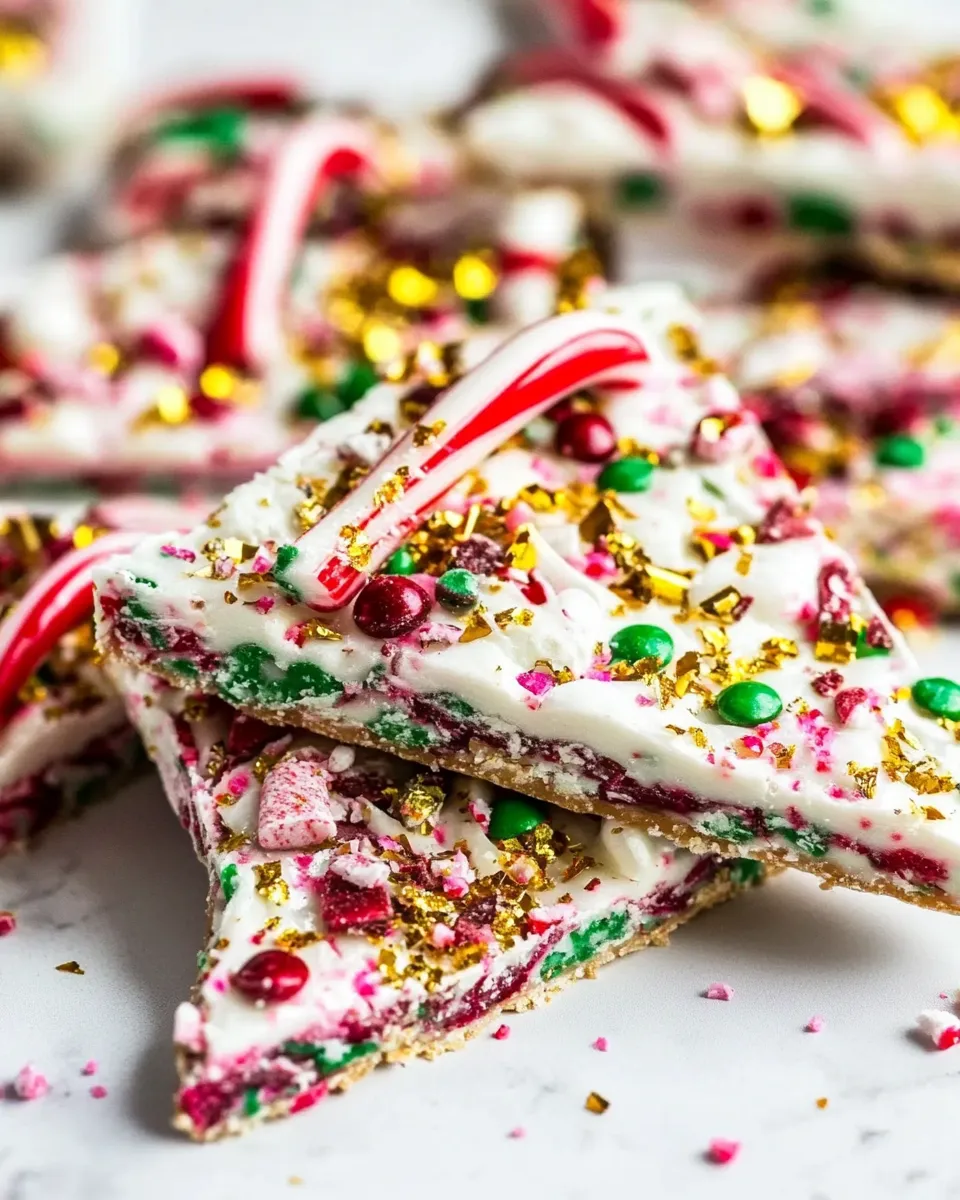
Christmas Candy Cane Bark
The holiday season is a time for celebration, joy, and of course, delicious treats. One of the simplest yet most delightful confections you can make is Christmas Candy Cane Bark. This festive treat combines the creamy sweetness of white chocolate with the refreshing crunch of peppermint. With its vibrant colors and crunchy textures, Christmas Candy Cane Bark not only tastes fantastic but also makes for a beautiful holiday gift or party treat. In this article, we will explore how to create this delightful candy bark step-by-step, ensuring that your holiday season is both sweet and memorable.
Why It Works Every Time
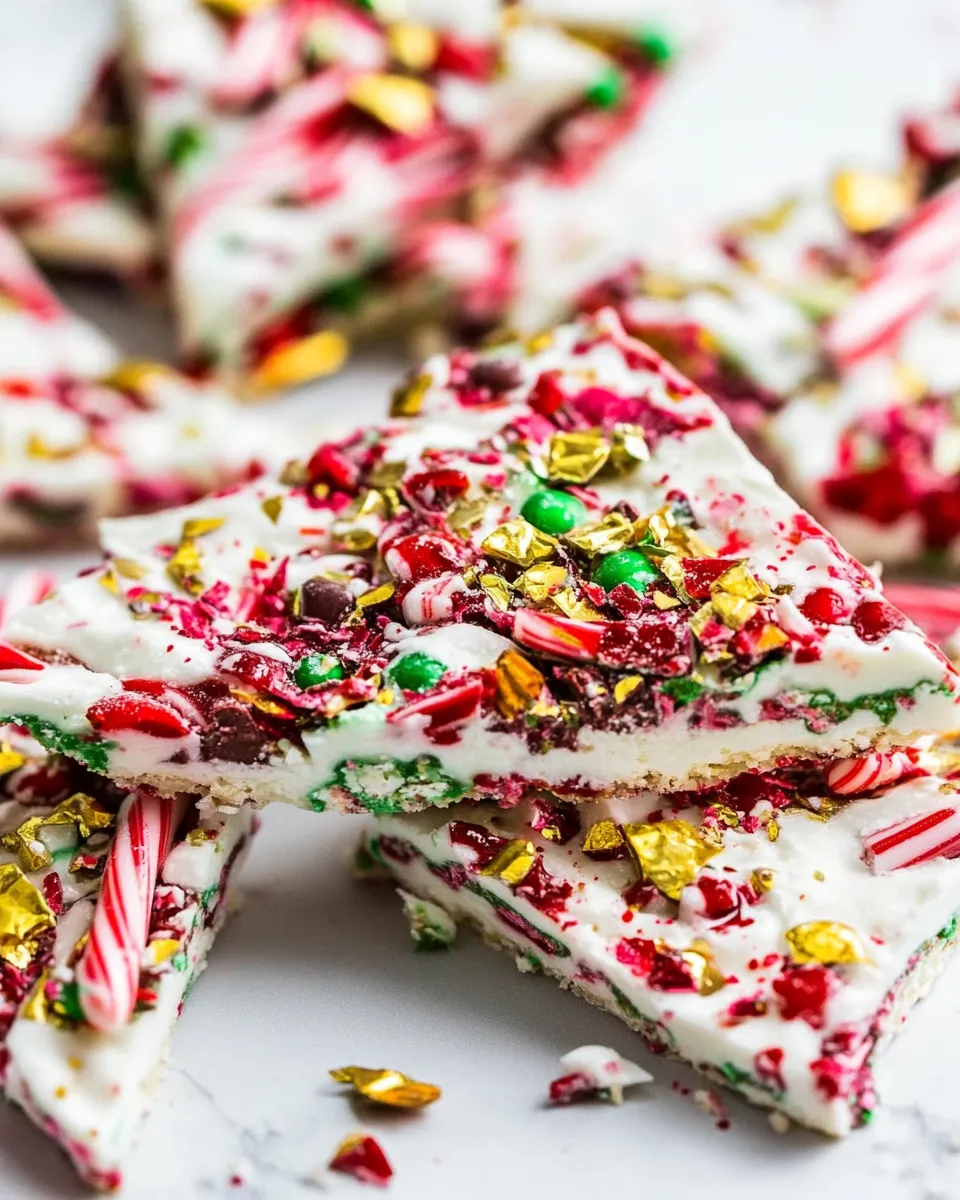
Christmas Candy Cane Bark is a tried-and-true recipe that never fails to impress. The combination of flavors—creamy white chocolate, rich green, and red candy melts, coupled with the crunch of pistachios, cranberries, and crushed candy canes—creates a symphony of taste and texture. The beauty of this bark is in its simplicity; it requires minimal ingredients and can be prepared quickly. Plus, it’s incredibly versatile! You can easily customize it by adding your favorite nuts or dried fruits. This candy bark is not just a treat; it’s a festive tradition waiting to happen.
Ingredient Checklist
To make Christmas Candy Cane Bark, gather the following ingredients:
- 12 ounces white candy melts
- 4 ounces red candy melts
- 4 ounces green candy melts
- 1 cup pistachios, chopped
- 1 cup dried cranberries, chopped
- 1 ounce candy cane pieces, crushed
Make sure to choose high-quality candy melts to ensure a smooth melting process and a delicious flavor. The combination of colors will create a visually stunning bark that captures the essence of the holidays.
Equipment Breakdown
Before you dive into the festive fun, make sure you have the following equipment:
- Microwave-safe bowls: For melting the candy melts.
- Parchment paper: To line your baking sheet for easy removal.
- Baking sheet: To spread out the melted candy.
- Spatula: For spreading and mixing.
- Measuring cups: To ensure accurate ingredient measurements.
Having these tools ready will streamline your candy-making process and ensure that everything goes smoothly.
Christmas Candy Cane Bark in Steps
Step 1: Prepare Your Workspace
Start by lining a baking sheet with parchment paper. This will prevent the candy from sticking and make cleanup a breeze.
Step 2: Melt the White Candy Melts
In a microwave-safe bowl, add the 12 ounces of white candy melts. Microwave in 30-second intervals, stirring in between until the candy is fully melted and smooth. Be careful not to overheat it.
Step 3: Spread the White Chocolate
Pour the melted white candy onto the prepared baking sheet. Using a spatula, spread it evenly to form a rectangle about ¼ inch thick.
Step 4: Melt the Red and Green Candy Melts
In separate bowls, melt the 4 ounces of red candy melts and the 4 ounces of green candy melts, using the same microwave method as before. Stir until smooth.
Step 5: Drizzle the Red and Green Candy
Using a spoon or a piping bag, drizzle the melted red and green candy over the white chocolate layer. You can create fun patterns or simply swirl them together for a marbled effect.
Step 6: Add the Toppings
Sprinkle the chopped pistachios, dried cranberries, and crushed candy cane pieces evenly over the top. This adds a festive crunch and makes your bark look even more beautiful.
Step 7: Set the Bark
Allow the bark to set at room temperature for about 1-2 hours, or you can place it in the refrigerator for about 30 minutes if you’re in a hurry.
Step 8: Break into Pieces
Once the bark is fully set, use your hands to break it into irregular pieces. This adds to the rustic charm of your Christmas Candy Cane Bark.
Quick Replacement Ideas
If you’re looking to mix things up or use what you have on hand, consider these replacement ideas:
- Use dark chocolate or milk chocolate candy melts instead of white for a different flavor profile.
- Swap out pistachios for almonds or walnuts for a nutty twist.
- Replace dried cranberries with dried cherries or raisins.
- Add sprinkles or edible glitter for an extra festive touch.
These quick replacements can help you customize your Christmas Candy Cane Bark to better suit your tastes or dietary preferences.
Steer Clear of These
When making your Christmas Candy Cane Bark, it’s important to avoid certain pitfalls:
- Don’t overheat the candy melts; this can cause them to seize up and become unusable.
- Avoid using regular chocolate chips, as they do not melt as smoothly as candy melts.
- Be cautious with the amount of toppings; too many can make the bark difficult to break apart.
By steering clear of these common mistakes, you’ll ensure that your bark turns out perfectly every time.
How to Store & Reheat
Once you’ve made your Christmas Candy Cane Bark, you’ll want to store it properly:
Keep the bark in an airtight container at room temperature for up to two weeks. If you live in a warmer climate, consider refrigerating it to prevent melting. If you need to reheat the bark, do so gently in the microwave at low power, just enough to soften it slightly.
Your Top Questions
Can I use chocolate chips instead of candy melts?
While you can use chocolate chips, they tend to melt differently and may not create the same smooth consistency as candy melts. It’s best to stick with candy melts for this recipe.
How do I make this bark vegan?
You can use vegan candy melts available in stores. Make sure the other ingredients like nuts and dried fruits are also vegan-friendly.
Can I freeze Christmas Candy Cane Bark?
Yes, you can freeze the bark! Just make sure to wrap it tightly in plastic wrap or foil before placing it in a freezer-safe container. It will keep well for up to three months.
What other toppings can I add to my bark?
You can add a variety of toppings such as dried fruits, nuts, or even mini marshmallows. Get creative and make it your own!
Reader Favorites
If you love making festive treats, you might also enjoy these reader favorites:
- Chocolate Covered Oreos
- No Bake Oreo Cheesecake Parfaits With Caramel
- Mint Oreo Ice Cream Parfaits With Caramel Sauce
Bring It to the Table
Christmas Candy Cane Bark is not just a treat; it’s a beautiful centerpiece for your holiday gatherings. Whether you’re hosting a festive party or looking for a thoughtful gift, this bark is sure to delight everyone. The vibrant colors and delicious flavors will bring a smile to the faces of those you share it with.
This holiday season, let the spirit of giving and sharing shine through with your homemade Christmas Candy Cane Bark. With its delightful taste and stunning appearance, it’s bound to become a cherished tradition in your home. Happy holidays and happy baking!
Share on Pinterest
Christmas Candy Cane Bark
Ingredients
Equipment
Method
- Step 1: Prepare Your Workspace - Start by lining a baking sheet with parchment paper. This will prevent the candy from sticking and make cleanup a breeze.
- Step 2: Melt the White Candy Melts - In a microwave-safe bowl, add the 12 ounces of white candy melts. Microwave in 30-second intervals, stirring in between until the candy is fully melted and smooth. Be careful not to overheat it.
- Step 3: Spread the White Chocolate - Pour the melted white candy onto the prepared baking sheet. Using a spatula, spread it evenly to form a rectangle about ¼ inch thick.
- Step 4: Melt the Red and Green Candy Melts - In separate bowls, melt the 4 ounces of red candy melts and the 4 ounces of green candy melts, using the same microwave method as before. Stir until smooth.
- Step 5: Drizzle the Red and Green Candy - Using a spoon or a piping bag, drizzle the melted red and green candy over the white chocolate layer. You can create fun patterns or simply swirl them together for a marbled effect.
- Step 6: Add the Toppings - Sprinkle the chopped pistachios, dried cranberries, and crushed candy cane pieces evenly over the top. This adds a festive crunch and makes your bark look even more beautiful.
- Step 7: Set the Bark - Allow the bark to set at room temperature for about 1-2 hours, or you can place it in the refrigerator for about 30 minutes if you’re in a hurry.
- Step 8: Break into Pieces - Once the bark is fully set, use your hands to break it into irregular pieces. This adds to the rustic charm of your Christmas Candy Cane Bark.
Notes
- Store in an airtight container at room temperature for up to two weeks.
- For warmer climates, refrigerate to prevent melting.
- To reheat, microwave gently at low power to soften slightly.