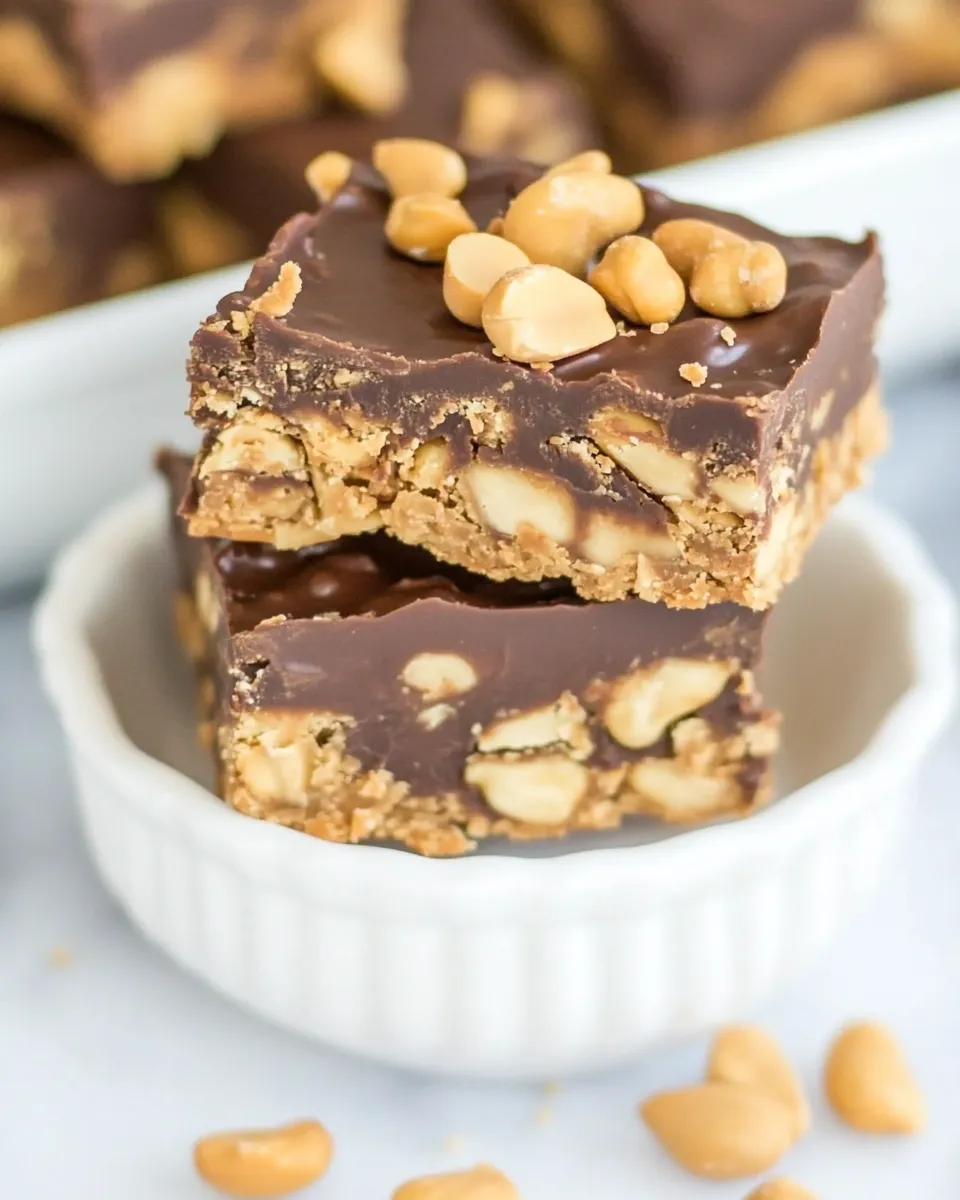
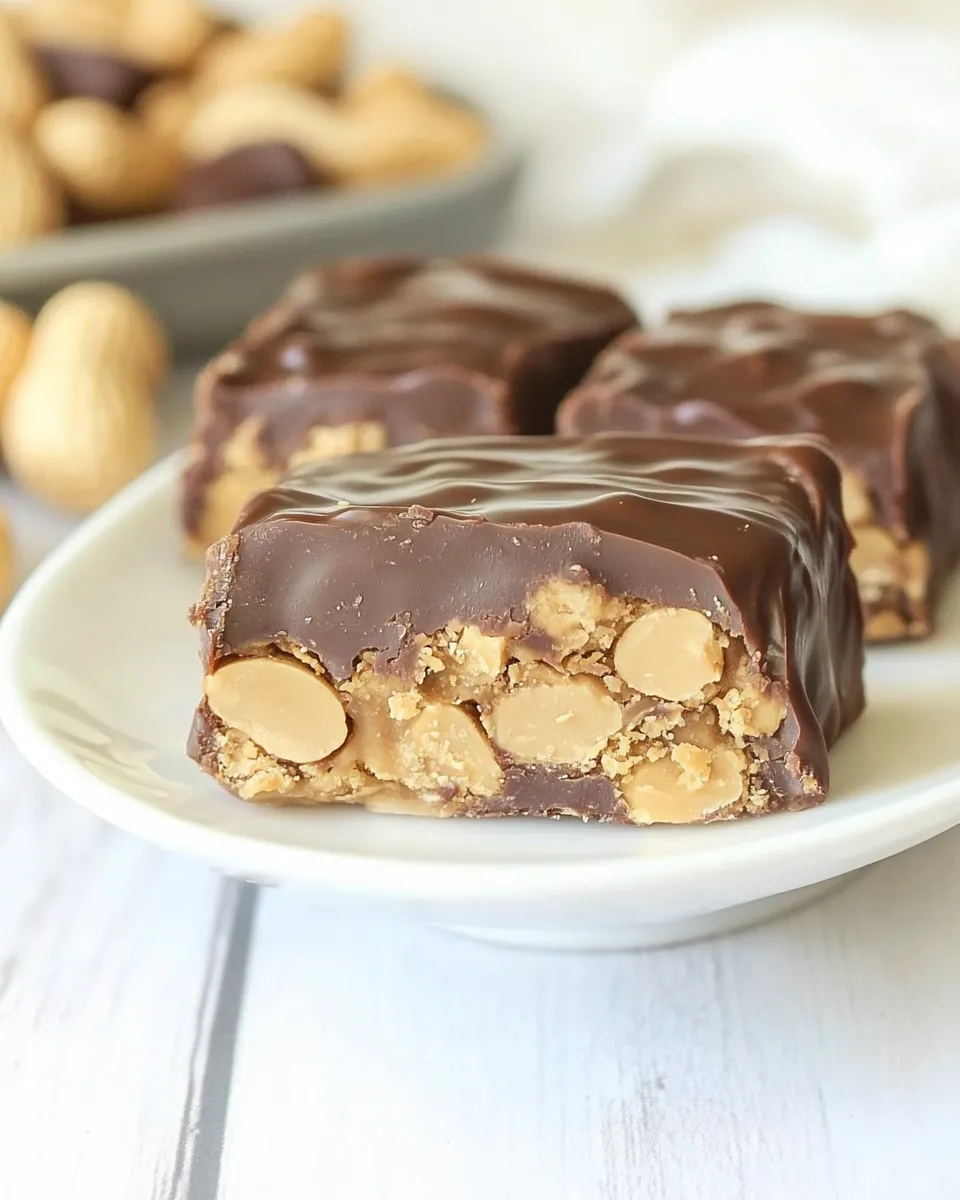
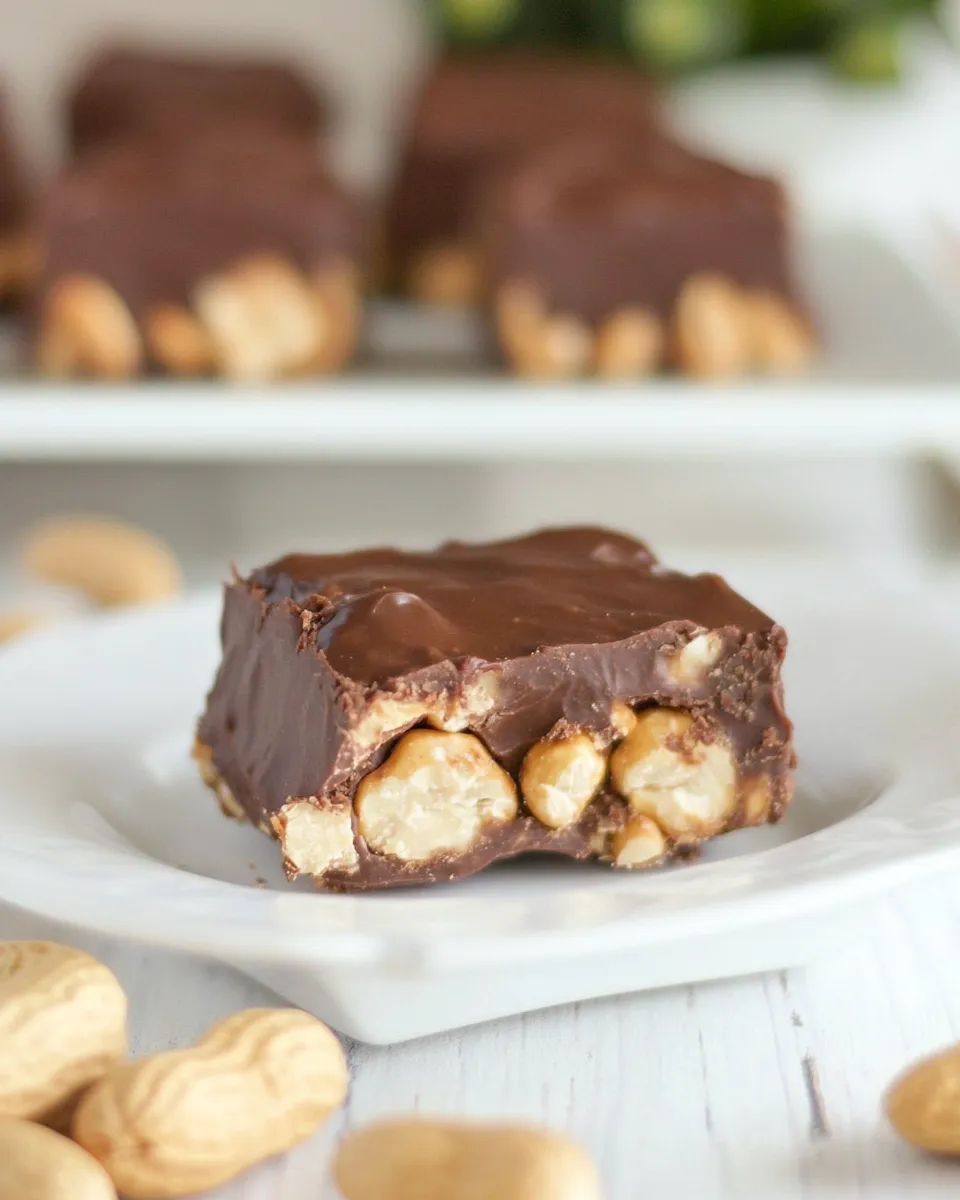
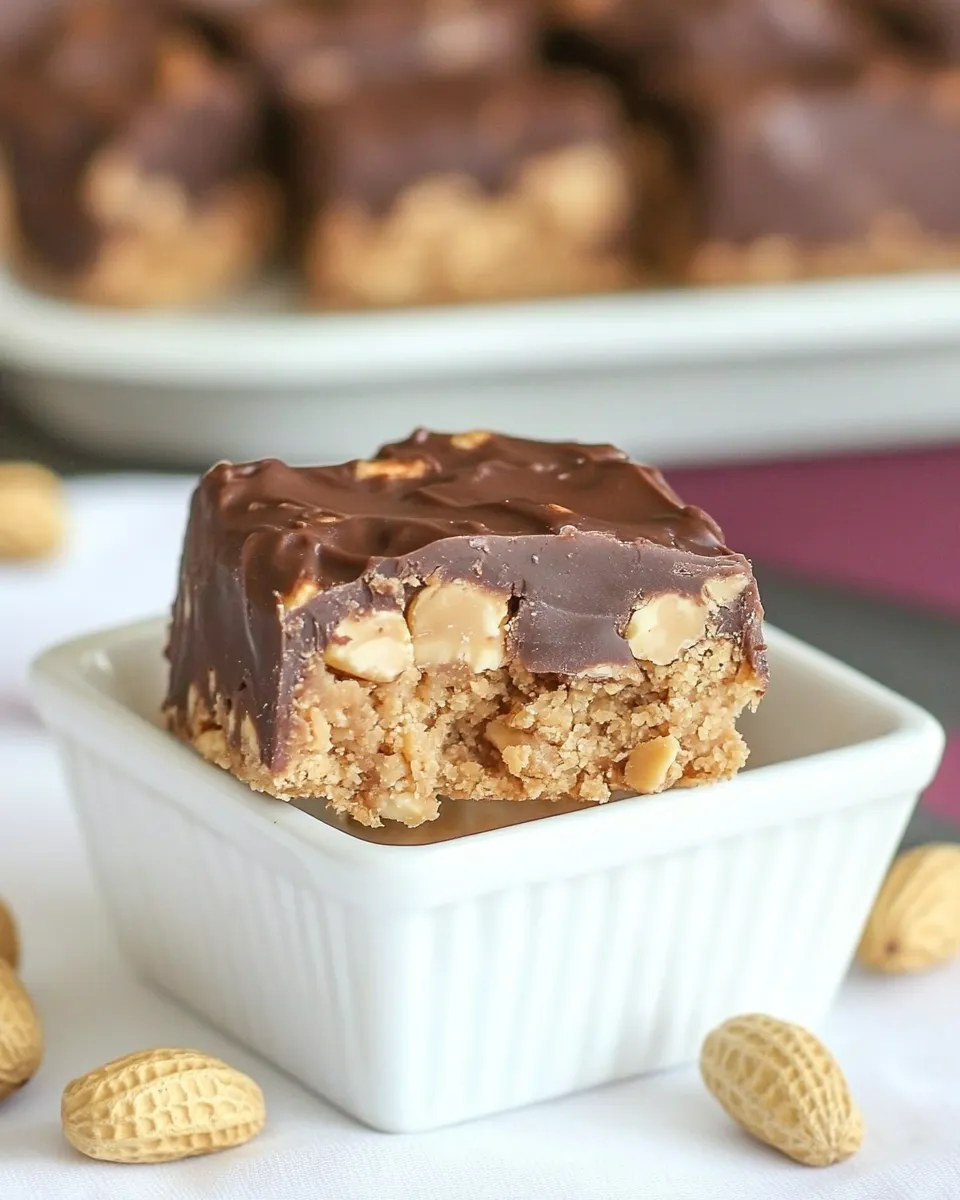
Peanut Butter Mountain Bars
If you’re a fan of the perfect combination of sweet and salty, then you’re in for a treat with these Peanut Butter Mountain Bars. These delightful bars are rich, creamy, and incredibly easy to make, making them the perfect dessert for any occasion. Whether you’re hosting a gathering or just indulging yourself at home, these bars will surely be a hit. With their luscious peanut butter filling and a decadent chocolate coating, they’re like a dream come true for peanut butter lovers. Let’s dive into the details of how to create this delightful dessert that will leave everyone asking for seconds!
Top Reasons to Make Peanut Butter Mountain Bars
- Irresistible Flavor: The combination of creamy peanut butter and rich chocolate is simply unbeatable.
- Quick and Easy: With just a few ingredients, these bars come together in no time.
- Perfect for Sharing: Cut them into bars and share with friends and family. They make a great party treat!
- Versatile Treat: Enjoy them as a dessert, snack, or even a special breakfast treat.
- Kid-Friendly: Kids love these bars, making them a perfect addition to lunchboxes.
Shopping List
- 3/4 cup chunky or creamy peanut butter: Choose your favorite for the perfect filling.
- 2 tablespoons butter, melted: This adds richness to the peanut butter mixture.
- 1 teaspoon vanilla extract: Enhances the overall flavor of the bars.
- 1 cup powdered sugar: Sweetens the filling to perfection.
- 16 ounces chocolate Candiquik or Almond Bark: This will be used for the chocolate coating.
- 1/2 cup finely chopped peanuts: For that extra crunch and flavor on top.
Equipment & Tools
- Mixing Bowl: For combining the peanut butter filling.
- Spatula: To help mix and spread the filling.
- 9×9-inch Baking Pan: Perfect size for this recipe.
- Microwave-Safe Bowl: For melting the chocolate.
- Knife or Pizza Cutter: To slice the bars into perfect squares.
Stepwise Method: Peanut Butter Mountain Bars
Step 1: Prepare the Baking Dish
Start by greasing your 9×9-inch baking pan with a little butter or line it with parchment paper for easy removal later.
Step 2: Make the Peanut Butter Filling
In a mixing bowl, combine the 3/4 cup creamy peanut butter, 2 tablespoons melted butter, 1 teaspoon vanilla extract, and 1 cup powdered sugar. Mix well until the ingredients are fully combined and smooth.
Step 3: Spread the Filling
Spread the peanut butter mixture evenly into the prepared baking pan. Use a spatula to smooth it out so it’s evenly distributed.
Step 4: Melt the Chocolate
In a microwave-safe bowl, melt the 16 ounces of chocolate Candiquik or Almond Bark according to package instructions, stirring until completely smooth.
Step 5: Pour the Chocolate Over the Filling
Once the chocolate is melted, pour it over the peanut butter layer. Use a spatula to spread it evenly across the top.
Step 6: Add Chopped Peanuts
Sprinkle the 1/2 cup finely chopped peanuts over the melted chocolate for added texture and crunch.
Step 7: Chill Until Firm
Place the pan in the refrigerator for about 1-2 hours or until the chocolate is set and firm.
Step 8: Slice and Serve
Once set, remove from the fridge and lift the bars out of the pan using the parchment paper (if used). Cut into squares and enjoy your Peanut Butter Mountain Bars!
Warm & Cool Weather Spins
- Warm Weather: Store the bars in the refrigerator to prevent the chocolate from melting.
- Cool Weather: These bars can be stored at room temperature in an airtight container, but keep an eye on the chocolate layer!
Easy-to-Miss Gotchas
- Ensure that the peanut butter is creamy for easy mixing; chunky peanut butter can make it harder to spread.
- Don’t skip the chilling time; it’s crucial for the bars to set properly.
- Be careful not to overheat the chocolate when melting, as it can seize up.
- Use a sharp knife to slice the bars for cleaner edges.
Cooling, Storing & Rewarming
Once your Peanut Butter Mountain Bars are cut, they can be stored in an airtight container. Keep them in the refrigerator for optimal freshness, where they can last up to two weeks. If you want to enjoy them warm, simply pop them in the microwave for a few seconds to soften the chocolate slightly. But be careful not to overheat them!
Reader Q&A
Can I use almond butter instead of peanut butter?
Absolutely! Almond butter will work just as well, and it adds a lovely nutty flavor to the bars.
How do I make these bars gluten-free?
All the ingredients listed are typically gluten-free, but always check the labels to ensure that they are certified gluten-free, especially the chocolate.
Can I freeze Peanut Butter Mountain Bars?
Yes! You can freeze the bars for up to three months. Just make sure to wrap them tightly in plastic wrap or place them in an airtight container.
What other toppings can I add?
Feel free to get creative! You can add mini chocolate chips, sea salt, or even drizzle extra chocolate on top for an added treat.
Final Bite
Peanut Butter Mountain Bars are a delightful treat that combines rich flavors and textures in every bite. They’re easy to make, and you can whip them up in no time, making them perfect for any occasion. These bars are sure to impress family and friends, whether you’re serving them at a party or enjoying them as a late-night snack. So grab your ingredients and get ready to embark on a delicious adventure with these scrumptious peanut butter bars! Indulging in these treats is not just a dessert; it’s an experience you won’t forget!
Peanut Butter Mountain Bars
Ingredients
Equipment
Method
- Start by greasing your 9x9-inch baking pan with a little butter or line it with parchment paper for easy removal later.
- In a mixing bowl, combine the 3/4 cup creamy peanut butter, 2 tablespoons melted butter, 1 teaspoon vanilla extract, and 1 cup powdered sugar. Mix well until the ingredients are fully combined and smooth.
- Spread the peanut butter mixture evenly into the prepared baking pan. Use a spatula to smooth it out so it’s evenly distributed.
- In a microwave-safe bowl, melt the 16 ounces of chocolate Candiquik or Almond Bark according to package instructions, stirring until completely smooth.
- Once the chocolate is melted, pour it over the peanut butter layer. Use a spatula to spread it evenly across the top.
- Sprinkle the 1/2 cup finely chopped peanuts over the melted chocolate for added texture and crunch.
- Place the pan in the refrigerator for about 1-2 hours or until the chocolate is set and firm.
- Once set, remove from the fridge and lift the bars out of the pan using the parchment paper (if used). Cut into squares and enjoy your Peanut Butter Mountain Bars!
Notes
- Store in the refrigerator for optimal freshness.
- These bars can be frozen for up to three months.
- Use a sharp knife for cleaner slices.