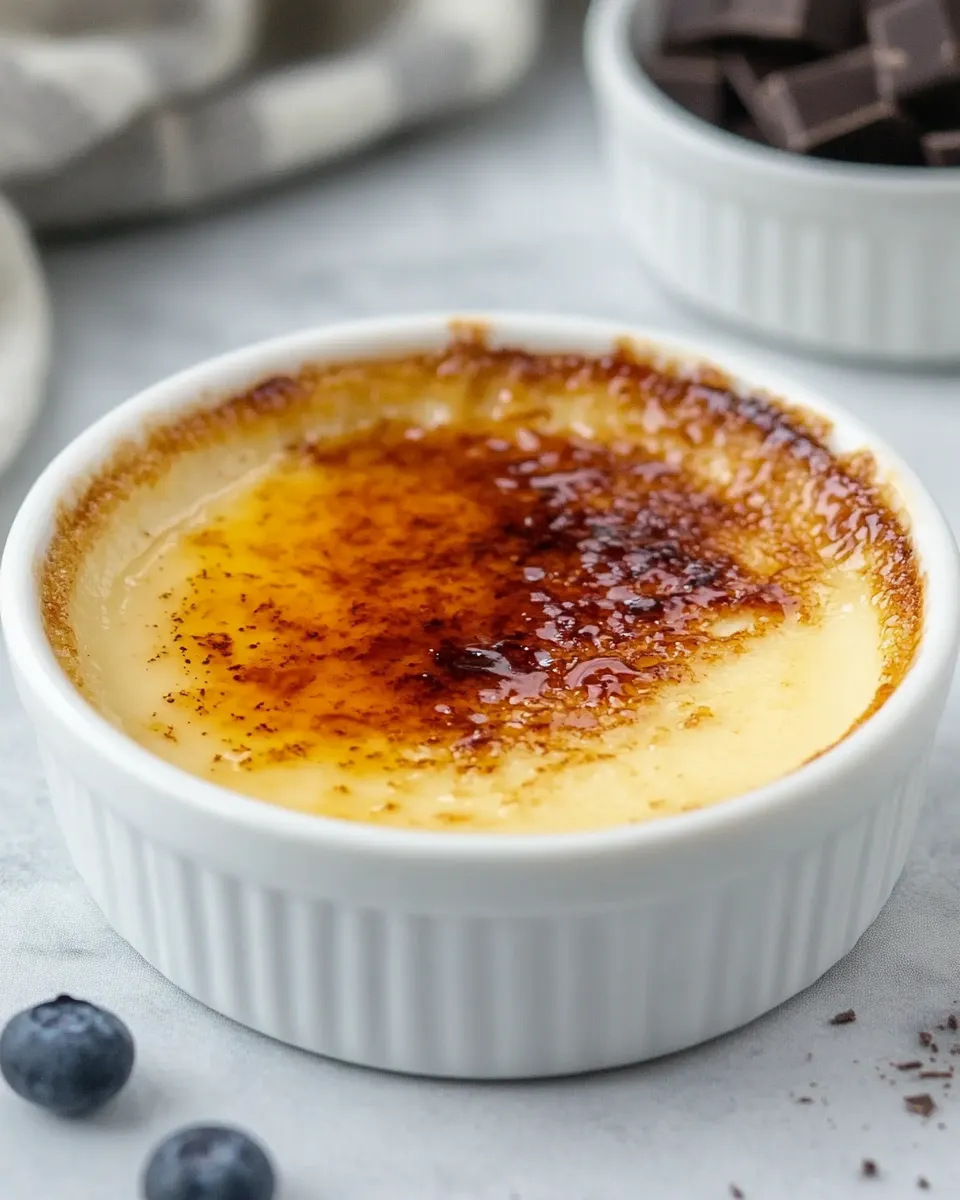
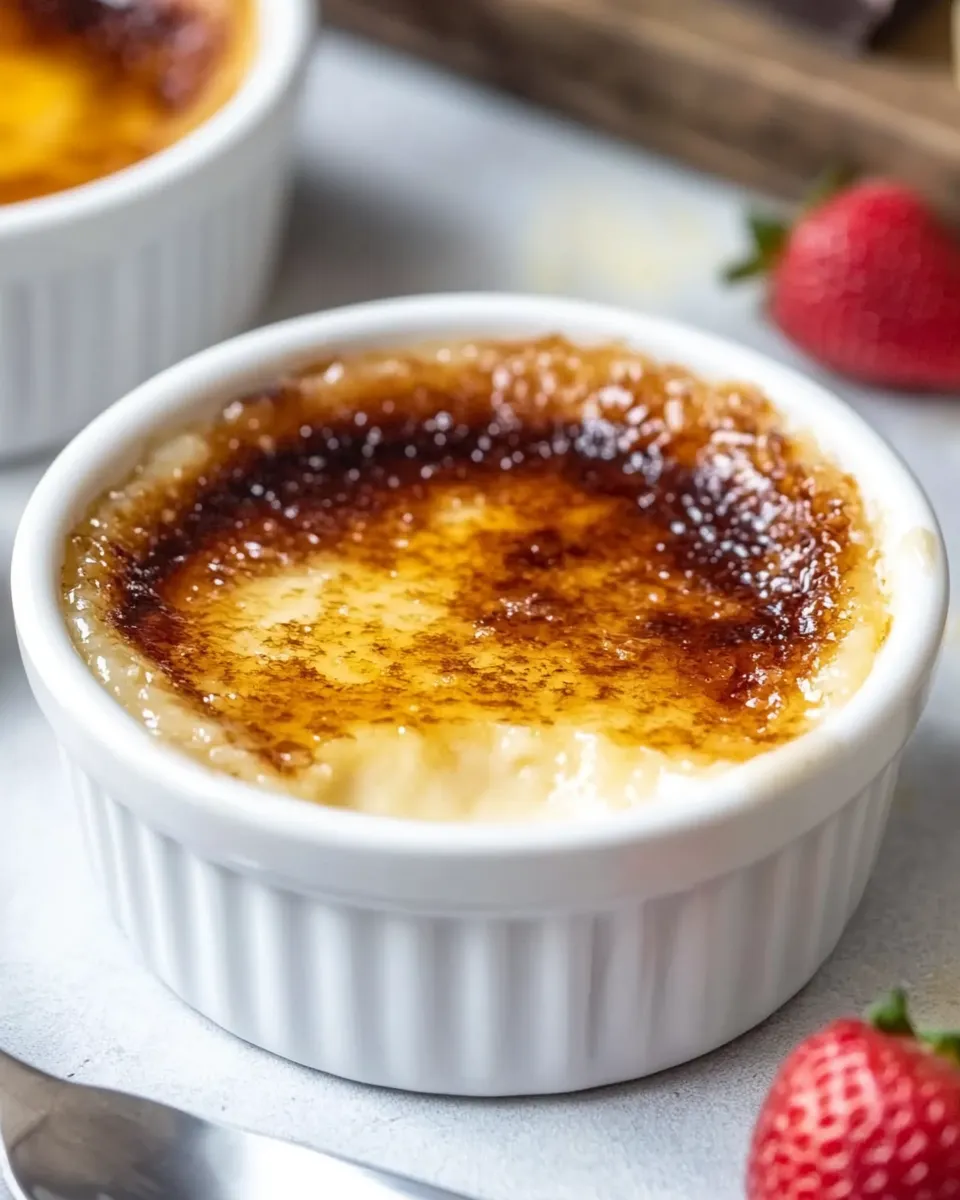
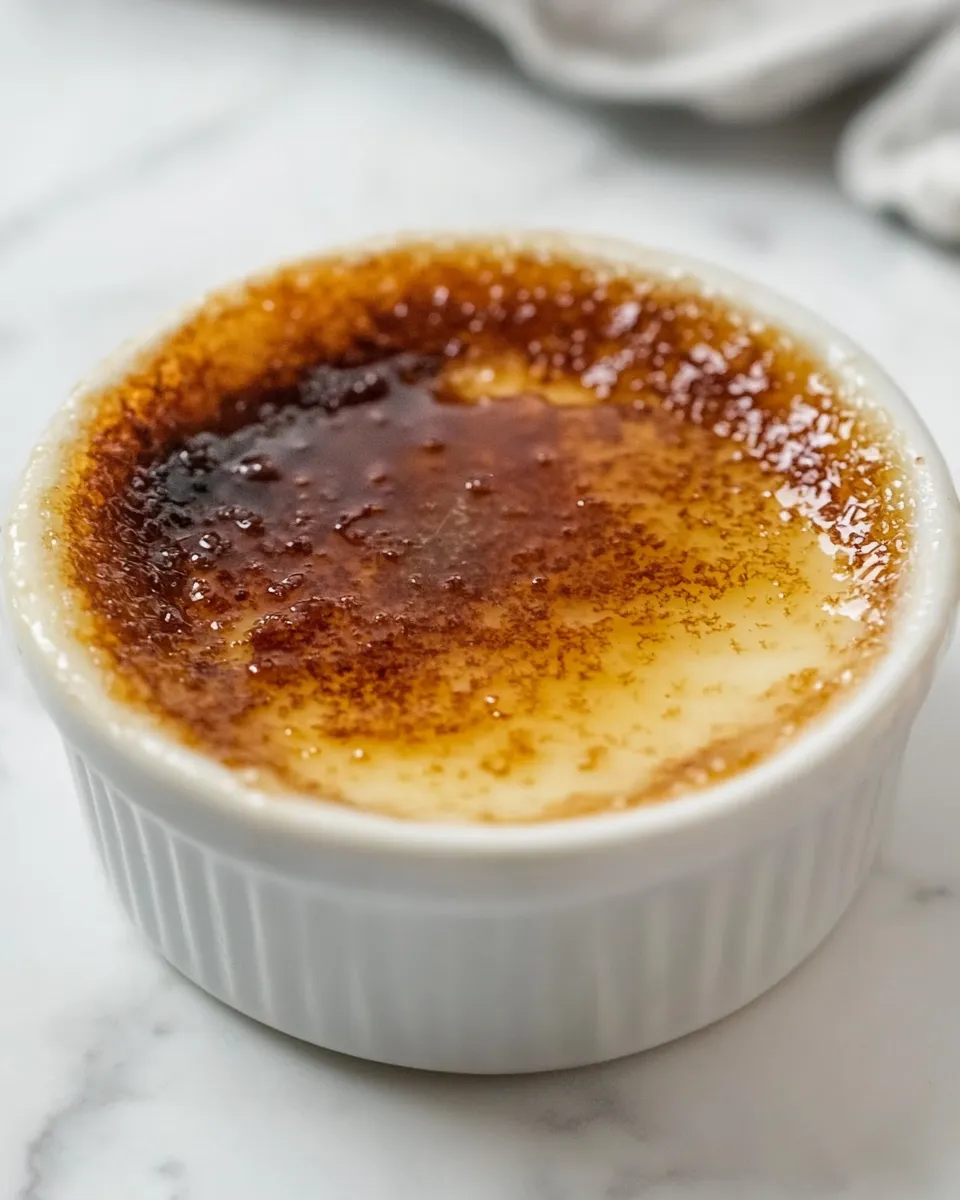
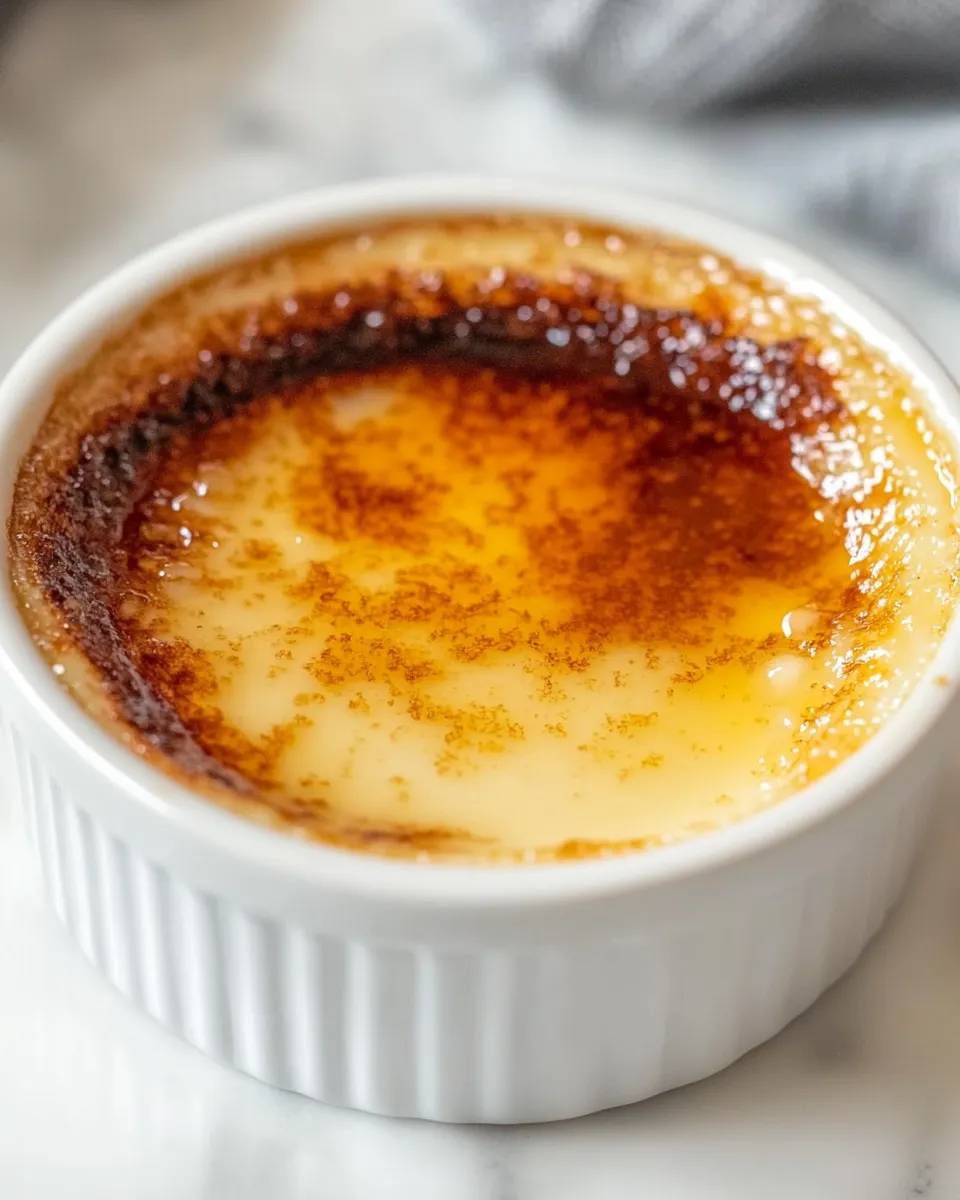
White Chocolate Creme Brulee
There’s nothing quite like the luxurious experience of indulging in a creamy, velvety White Chocolate Creme Brulee. This classic dessert marries the rich sweetness of white chocolate with a silky custard base, topped with a perfectly caramelized sugar crust. It’s a dessert that impresses at any dinner party and is a wonderful way to indulge yourself after a long day. Whether you’re celebrating a special occasion or simply treating yourself to something sweet, this recipe will undoubtedly become a favorite in your dessert repertoire.
Reasons to Love White Chocolate Creme Brulee
There are so many reasons to fall in love with White Chocolate Creme Brulee. First and foremost, the flavor is absolutely divine. The combination of rich white chocolate and creamy custard creates a delectable harmony that melts in your mouth.
Moreover, the contrast between the smooth custard and the crunchy caramelized sugar top provides an irresistible texture. Making this dessert is also surprisingly easy—if you can whip up a custard, you can make this! Plus, it can be prepared in advance, making it the perfect dessert for entertaining.
Lastly, this dessert has a touch of elegance that makes every bite feel special. It’s a simple yet sophisticated treat that is sure to impress your guests!
Shopping List
- 6 egg yolks, room temperature
- 1/2 cup granulated sugar
- 2 cups heavy cream
- 8 oz white chocolate, chopped
- 1 teaspoon vanilla extract
- 1/4 teaspoon salt
- 1/3 cup fine sugar (for the topping)
Toolbox for This Recipe
- Ramekins: Ideal for portioning your creme brulee.
- Mixing Bowls: For whisking your ingredients together.
- Whisk: Essential for achieving a smooth custard.
- Kitchen Torch: For caramelizing the sugar topping.
- Oven Safe Dish: To create a water bath for baking.
Method: White Chocolate Creme Brulee
Step 1: Preheat the Oven
Preheat your oven to 325°F (160°C). This ensures that your White Chocolate Creme Brulee bakes evenly.
Step 2: Prepare the Cream Mixture
In a saucepan over medium heat, combine the heavy cream, chopped white chocolate, vanilla extract, and salt. Stir occasionally until the white chocolate is completely melted and the mixture is smooth. Remove from heat and set aside to cool slightly.
Step 3: Whisk the Egg Yolks
In a mixing bowl, whisk together the egg yolks and granulated sugar until the mixture is pale and thick. This will give your custard a rich, creamy texture.
Step 4: Combine Mixtures
Slowly pour the warm cream mixture into the egg yolk mixture, whisking continuously to prevent the eggs from scrambling. Once fully combined, strain the mixture through a fine-mesh sieve into another bowl to ensure it’s completely smooth.
Step 5: Prepare the Ramekins
Place your ramekins in a deep baking dish. Pour the custard mixture evenly into the ramekins, filling them about three-quarters full.
Step 6: Create a Water Bath
Pour hot water into the baking dish around the ramekins until it reaches halfway up their sides. This water bath will help regulate the temperature as the custard bakes, ensuring a creamy consistency.
Step 7: Bake
Carefully place the baking dish in the oven and bake for 30-35 minutes, or until the edges are set but the center still jiggles slightly.
Step 8: Cool Down
Remove the baking dish from the oven and let the ramekins cool in the water bath for about 15 minutes. Then, remove them from the water bath and refrigerate for at least 2 hours, or overnight, until fully chilled.
Step 9: Caramelize the Sugar Topping
Before serving, sprinkle about 1 tablespoon of fine sugar evenly over the top of each custard. Using a kitchen torch, carefully caramelize the sugar until it forms a crispy, golden crust. If you don’t have a torch, you can place the ramekins under a broiler for a few minutes, watching closely to prevent burning.
Step 10: Serve and Enjoy!
Allow the caramelized sugar to cool for a minute before serving. Crack through the crispy layer with a spoon, and enjoy the creamy goodness beneath!
Seasonal Serving Ideas
- Top with fresh berries for a burst of color and flavor.
- Serve with a dollop of whipped cream for added richness.
- Drizzle with a homemade Chocolate Sauce for a decadent twist.
- Pair with a citrus sorbet to balance the richness.
Watch Outs & How to Fix
When making White Chocolate Creme Brulee, it’s essential to keep an eye on the baking time. Overbaking can lead to a grainy texture. If the custards feel too firm, they may have been baked too long. If you see any bubbles in the custard while baking, it indicates that the temperature was too high; this may also lead to a less than desirable texture.
- If the sugar topping burns, simply scrape it off and try again.
- For an even more perfect custard, ensure your cream mixture is warm but not boiling when mixed with the egg yolks.
- If your caramel doesn’t harden, it could be because the sugar wasn’t heated sufficiently—try using a kitchen torch for more control.
Store, Freeze & Reheat
Your White Chocolate Creme Brulee can be stored in the refrigerator without the sugar topping for up to 3 days. Just cover the ramekins with plastic wrap to prevent them from absorbing other odors in the fridge.
- To freeze, remove the sugar topping and wrap each ramekin securely. They can be frozen for up to 2 months.
- To reheat, thaw in the refrigerator overnight and then caramelize the sugar topping just before serving.
Common Questions
Can I use milk instead of heavy cream?
While you can substitute milk for heavy cream, the texture and richness of the White Chocolate Creme Brulee will be compromised. It’s best to use heavy cream for the creamiest results.
What can I use instead of white chocolate?
If you’re not a fan of white chocolate, you can try using dark chocolate for a different flavor profile. However, the overall sweetness and texture will change significantly.
How do I know when the custard is done baking?
The custard is done when the edges are set, but the center should still be slightly jiggly. It will continue to firm up as it cools in the refrigerator.
Can I add flavors to the custard?
Absolutely! You can infuse your cream with flavors like lavender, mint, or even a splash of espresso to create unique variations of White Chocolate Creme Brulee.
Time to Try It
There’s no better time to dive into the world of homemade desserts than now! With your ingredients ready and your tools at hand, you’re just a few steps away from creating your very own White Chocolate Creme Brulee. Whether for a gathering or a quiet night in, this dessert promises to deliver a delightful culinary experience. So, grab your ramekins and get started—your taste buds are in for a treat!
White Chocolate Creme Brulee
Ingredients
Equipment
Method
- Preheat your oven to 325°F (160°C). This ensures that your White Chocolate Creme Brulee bakes evenly.
- In a saucepan over medium heat, combine the heavy cream, chopped white chocolate, vanilla extract, and salt. Stir occasionally until the white chocolate is completely melted and the mixture is smooth. Remove from heat and set aside to cool slightly.
- In a mixing bowl, whisk together the egg yolks and granulated sugar until the mixture is pale and thick. This will give your custard a rich, creamy texture.
- Slowly pour the warm cream mixture into the egg yolk mixture, whisking continuously to prevent the eggs from scrambling. Once fully combined, strain the mixture through a fine-mesh sieve into another bowl to ensure it's completely smooth.
- Place your ramekins in a deep baking dish. Pour the custard mixture evenly into the ramekins, filling them about three-quarters full.
- Pour hot water into the baking dish around the ramekins until it reaches halfway up their sides. This water bath will help regulate the temperature as the custard bakes, ensuring a creamy consistency.
- Carefully place the baking dish in the oven and bake for 30-35 minutes, or until the edges are set but the center still jiggles slightly.
- Remove the baking dish from the oven and let the ramekins cool in the water bath for about 15 minutes. Then, remove them from the water bath and refrigerate for at least 2 hours, or overnight, until fully chilled.
- Before serving, sprinkle about 1 tablespoon of fine sugar evenly over the top of each custard. Using a kitchen torch, carefully caramelize the sugar until it forms a crispy, golden crust. If you don’t have a torch, you can place the ramekins under a broiler for a few minutes, watching closely to prevent burning.
- Allow the caramelized sugar to cool for a minute before serving. Crack through the crispy layer with a spoon, and enjoy the creamy goodness beneath!
Notes
- Store in the refrigerator without sugar topping for up to 3 days.
- Freeze for up to 2 months, removing sugar topping before wrapping.
- Reheat by thawing in the refrigerator overnight before caramelizing the sugar again.