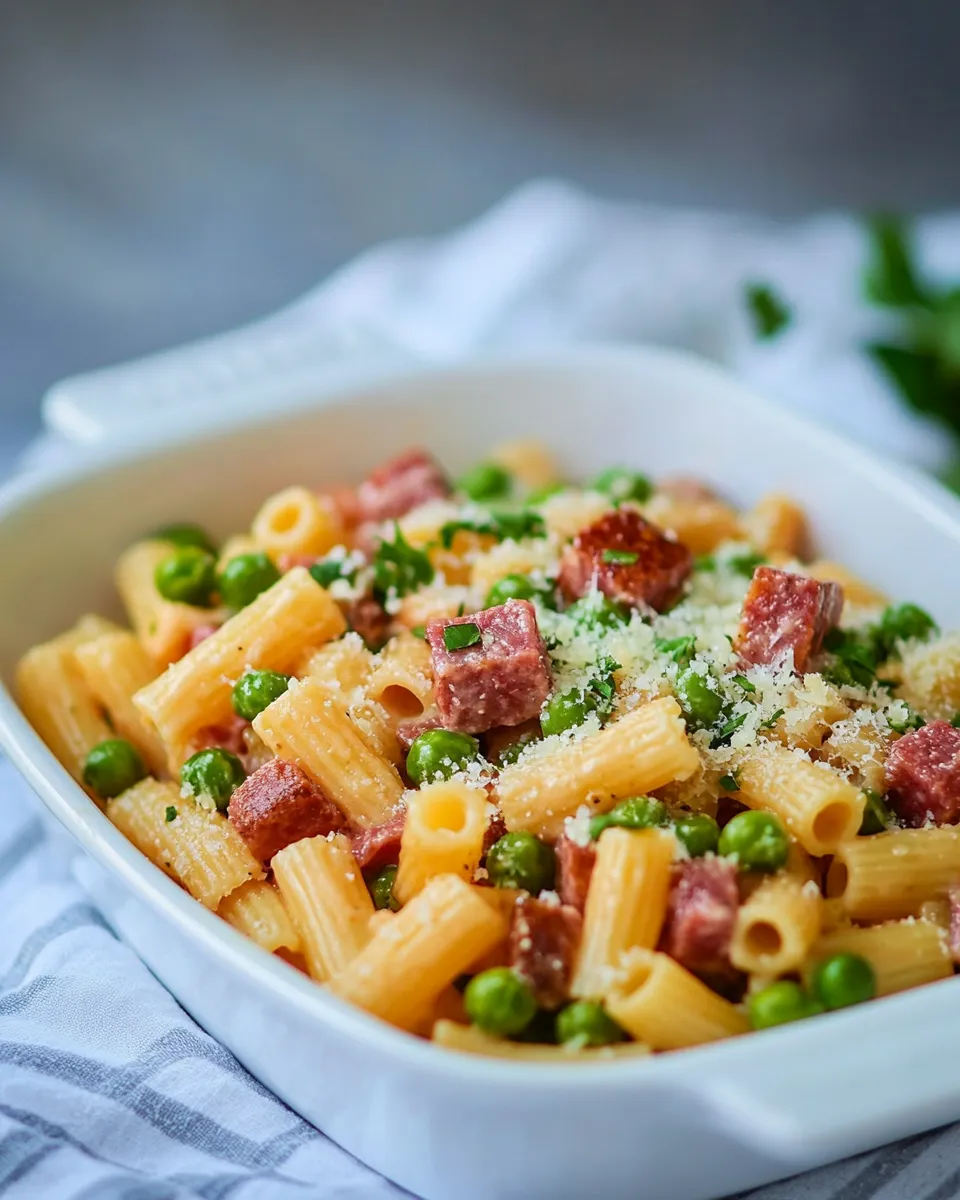
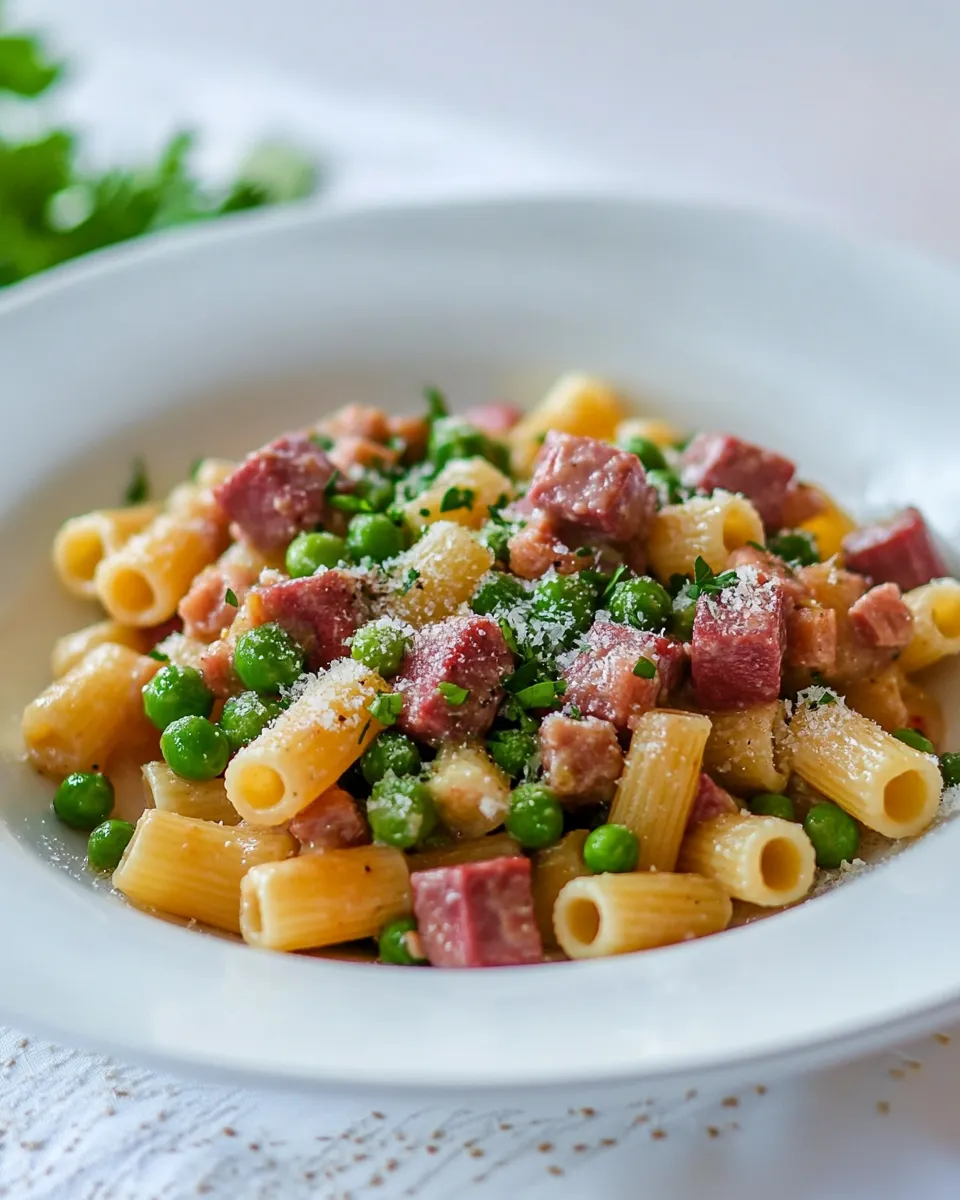
PASTA WITH PEAS AND KIELBASA
There’s something incredibly comforting about a warm bowl of pasta, especially when it’s infused with the vibrant flavors of fresh vegetables and savory meats. Today, I’m excited to share a delightful recipe for PASTA WITH PEAS AND KIELBASA that’s not only easy to make but also packed with nutrition and flavor. This dish comes together in a single pot, making cleanup a breeze, and it showcases the sweet pops of peas alongside the hearty goodness of kielbasa. Whether you’re looking for a weeknight dinner or something to impress your family on the weekend, this dish is sure to become a household favorite.
Why You’ll Love This Recipe
Imagine a dish that combines the richness of sausage with the freshness of garden peas and carrots, all enveloped in tender ditalini pasta. This PASTA WITH PEAS AND KIELBASA is a symphony of textures and tastes. It’s:
– Quick and easy to make—perfect for busy weeknights.
– Versatile—feel free to swap in your favorite vegetables.
– A one-pot meal—less mess, more enjoyment.
– Comforting and filling, making it a hit with both kids and adults.
What’s in the Bowl
To create this delightful dish, you’ll need the following ingredients:
- 2 tablespoons extra virgin olive oil
- 1 cup shredded carrot
- 1 cup frozen peas
- 1 cup diced kielbasa
- 1 cup ditalini pasta
- 3 cups chicken stock or water (see note)
- 4 bay leaves
- 1/2 cup chopped parsley
- Parmesan cheese to serve
Appliances & Accessories
Before you start cooking, gather these essential tools:
- Large pot: For cooking the pasta and other ingredients together.
- Wooden spoon: Ideal for stirring and combining ingredients.
- Measuring cups and spoons: To ensure accurate ingredient quantities.
- Knife and cutting board: For chopping the kielbasa and vegetables.
PASTA WITH PEAS AND KIELBASA: Step-by-Step Guide
Ready to dive into making this delicious PASTA WITH PEAS AND KIELBASA? Here’s how to do it step by step:
Step 1: Prepare Your Ingredients
Start by gathering all your ingredients. Dice the kielbasa into bite-sized pieces, shred the carrot, and chop the parsley. Having everything ready will make the cooking process seamless.
Step 2: Sauté the Kielbasa
In a large pot, heat the extra virgin olive oil over medium heat. Add the diced kielbasa and sauté for about 5 minutes, or until lightly browned and fragrant. This step enhances the flavor of the dish through caramelization.
Step 3: Add the Vegetables
Next, add the shredded carrot and frozen peas to the pot. Stir everything together and let it cook for another 3 minutes. The heat will help the peas to thaw and the carrots to soften, creating a colorful mixture.
Step 4: Incorporate the Pasta
Now, it’s time to add the ditalini pasta to the pot. Give everything a good stir to combine the ingredients evenly.
Step 5: Pour in the Liquid
Pour in the chicken stock or water and add the bay leaves. Stir well, ensuring that the pasta is submerged in the liquid. Bring the mixture to a boil.
Step 6: Simmer
Once boiling, reduce the heat to low and cover the pot. Let it simmer for about 10-12 minutes, or until the pasta is tender and has absorbed most of the liquid. Stir occasionally to prevent sticking.
Step 7: Finish Off the Dish
After the pasta is cooked, remove the bay leaves and stir in the chopped parsley. This adds a fresh touch and vibrant color to your dish.
Step 8: Serve
Ladle the PASTA WITH PEAS AND KIELBASA into bowls and top with freshly grated Parmesan cheese. Enjoy the warm, comforting flavors!
International Equivalents
If you’re cooking from outside of the United States or looking for equivalents, here are some helpful conversions:
- 1 cup: Approximately 240 mL
- 2 tablespoons: Approximately 30 mL
- 1 bay leaf: Can be substituted with a pinch of dried thyme or oregano
If You’re Curious
Curious about the health benefits of this dish? Here are some highlights:
- Peas: Rich in vitamins A, C, and K, and a good source of fiber.
- Carrots: Packed with beta-carotene, fiber, and antioxidants.
- Kielbasa: A protein-rich ingredient that adds flavor and heartiness.
Prep Ahead & Store
This PASTA WITH PEAS AND KIELBASA is great for meal prep! Here’s how to make it work for you:
You can prepare the ingredients ahead of time by chopping the vegetables and storing them in the fridge. The dish can also be made in advance and stored in an airtight container in the refrigerator for up to 3 days. To reheat, simply warm it on the stove with a splash of water or stock to bring back the moisture.
Popular Questions
Can I use fresh peas instead of frozen?
Absolutely! Fresh peas can be used in place of frozen. Just make sure to add them a little later in the cooking process as they cook faster.
What can I substitute for kielbasa?
If you prefer, you can swap kielbasa for any other type of sausage, such as turkey sausage or chicken sausage, for a lighter option.
Can I add other vegetables?
Definitely! Feel free to add vegetables like bell peppers, zucchini, or spinach for added nutrition and flavor.
Can I make this dish vegan?
Yes! Simply omit the kielbasa and replace the chicken stock with vegetable broth. You can use plant-based sausages for added flavor if desired.
If you love PASTA WITH PEAS AND KIELBASA, you might also enjoy these recipes:
Hungry for More?
For more delicious recipes and cooking tips, don’t forget to check back often. Whether you’re looking for comfort food, quick weeknight meals, or something to impress your guests, there’s always something new to discover in the world of cooking!
This PASTA WITH PEAS AND KIELBASA is not just a meal; it’s a celebration of flavors that come together beautifully. With its vibrant colors and satisfying taste, it’s a dish that brings everyone to the table. So grab your ingredients, follow these simple steps, and enjoy a delightful dinner that’s sure to please!

PASTA WITH PEAS AND KIELBASA
Ingredients
Equipment
Method
- Start by gathering all your ingredients. Dice the kielbasa into bite-sized pieces, shred the carrot, and chop the parsley. Having everything ready will make the cooking process seamless.
- In a large pot, heat the extra virgin olive oil over medium heat. Add the diced kielbasa and sauté for about 5 minutes, or until lightly browned and fragrant.
- Next, add the shredded carrot and frozen peas to the pot. Stir everything together and let it cook for another 3 minutes.
- Now, it’s time to add the ditalini pasta to the pot. Give everything a good stir to combine the ingredients evenly.
- Pour in the chicken stock or water and add the bay leaves. Stir well, ensuring that the pasta is submerged in the liquid. Bring the mixture to a boil.
- Once boiling, reduce the heat to low and cover the pot. Let it simmer for about 10-12 minutes, or until the pasta is tender and has absorbed most of the liquid. Stir occasionally to prevent sticking.
- After the pasta is cooked, remove the bay leaves and stir in the chopped parsley.
- Ladle the Pasta with Peas and Kielbasa into bowls and top with freshly grated Parmesan cheese. Enjoy!
Notes
- You can prepare the ingredients ahead of time and store them in the fridge.
- This dish can be made in advance and stored in an airtight container in the refrigerator for up to 3 days.
- To reheat, warm it on the stove with a splash of water or stock to bring back moisture.