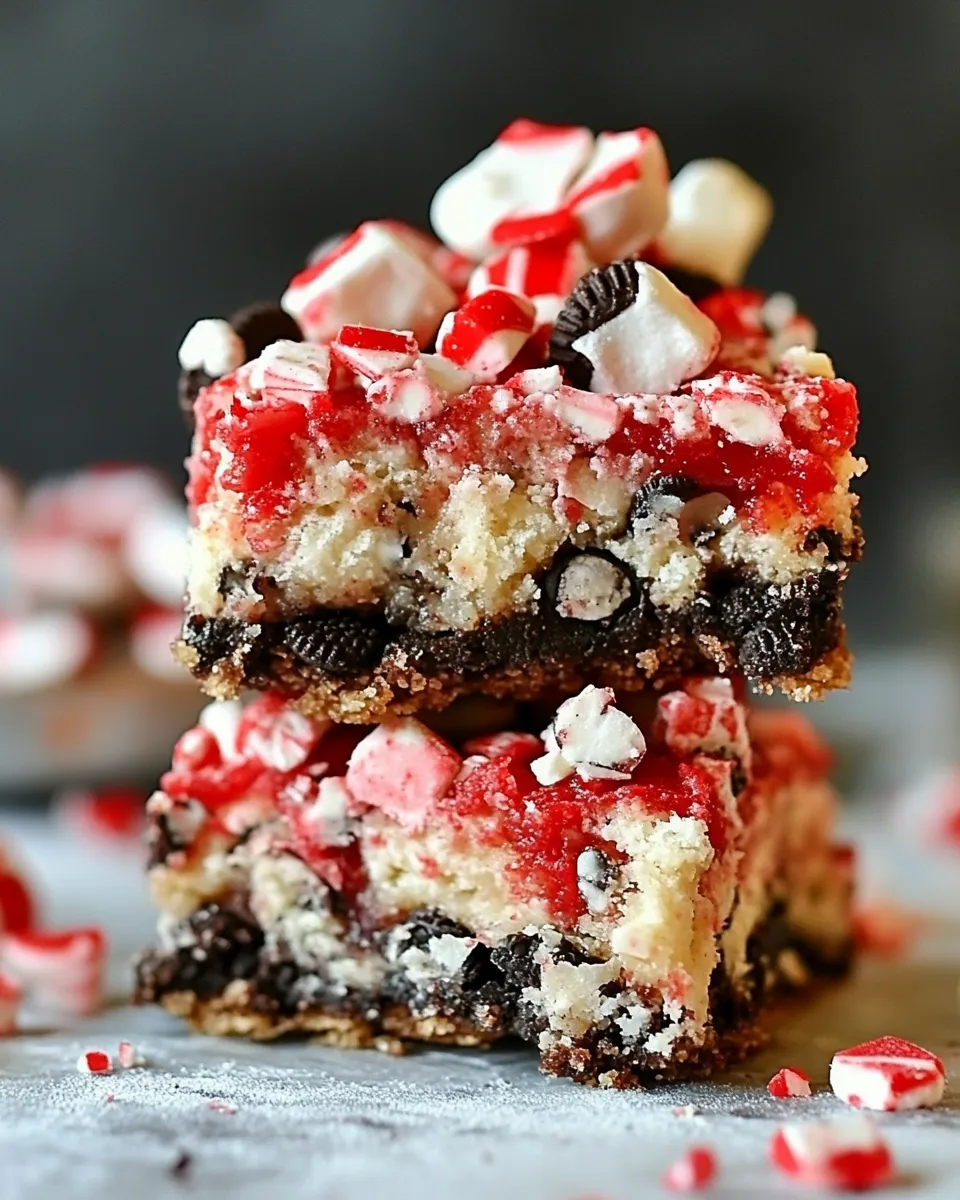
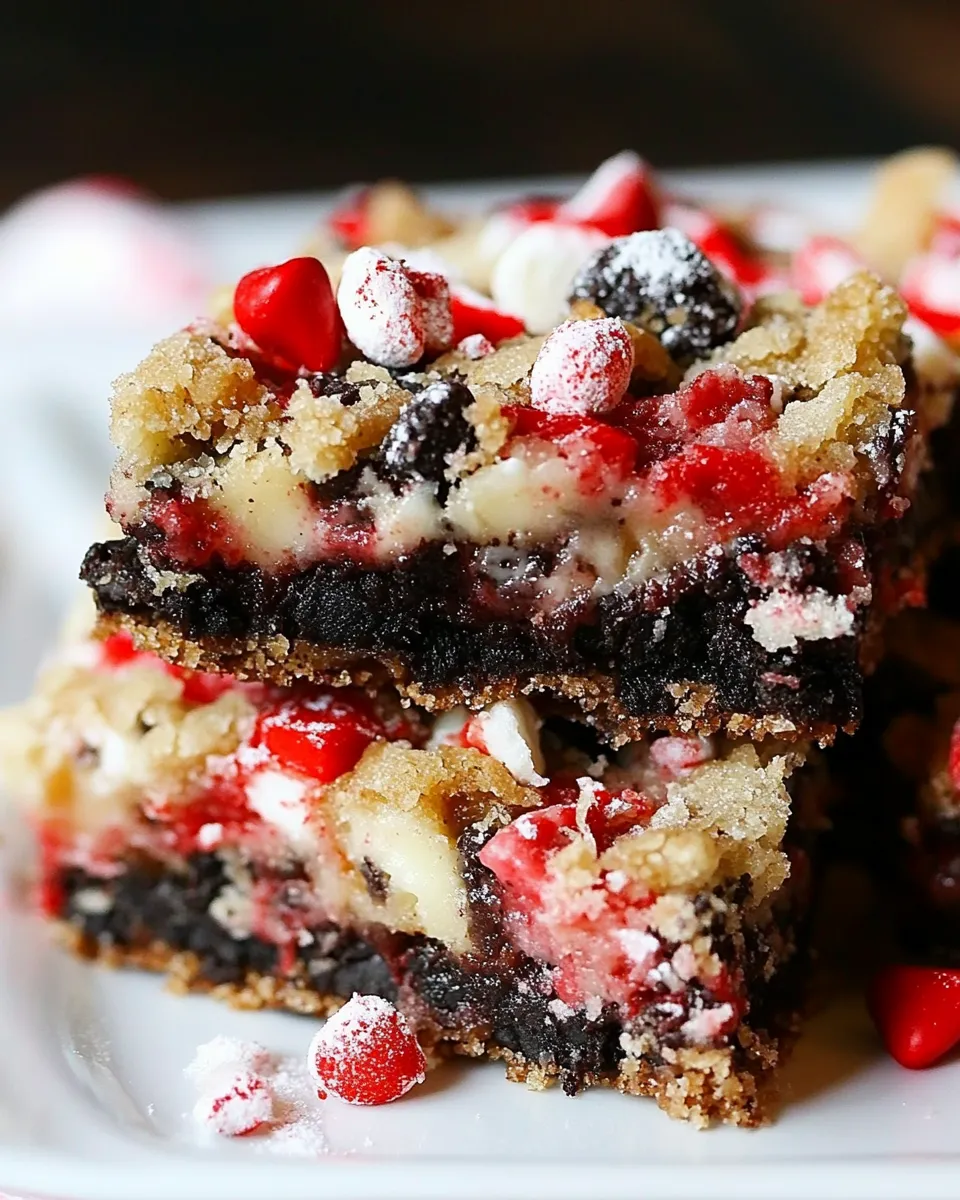
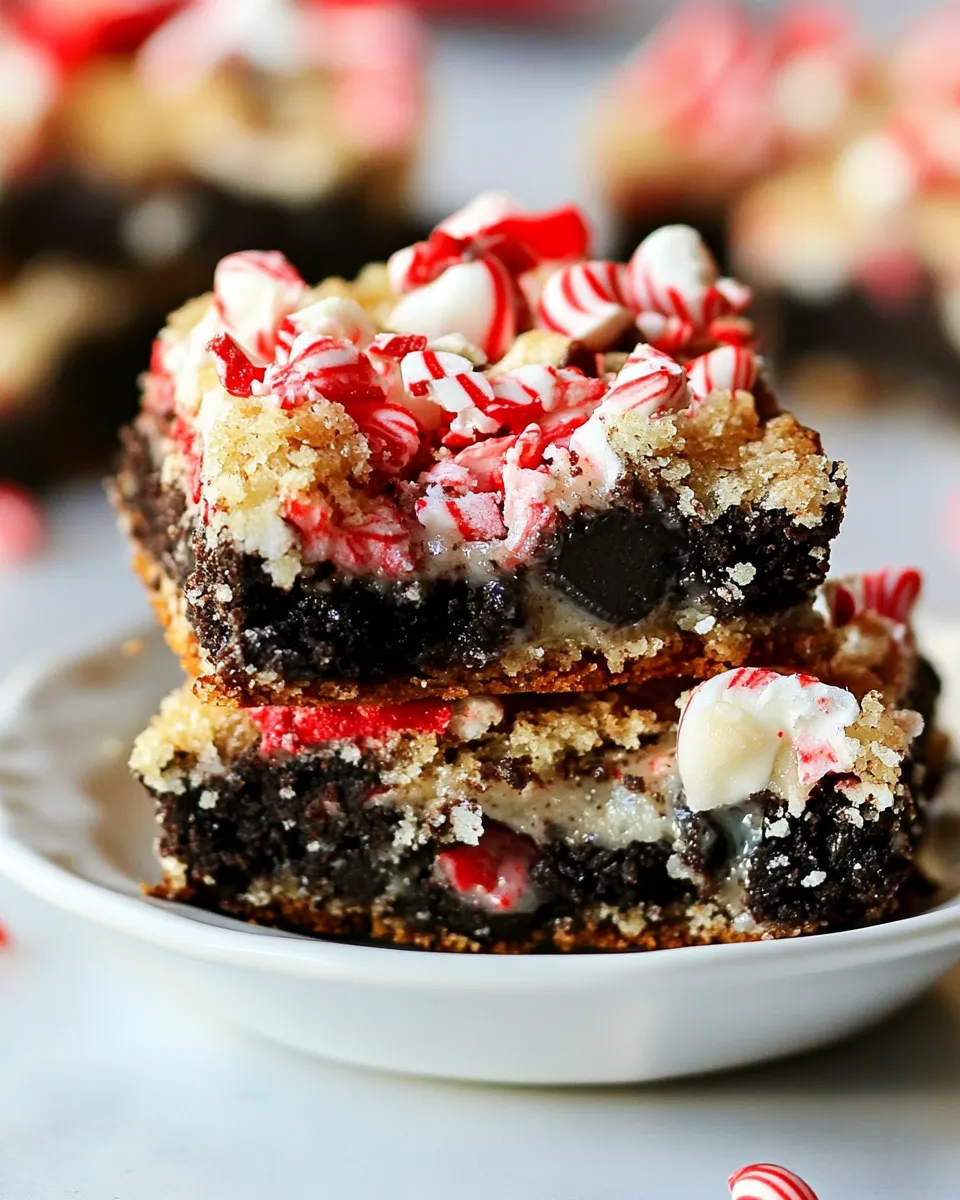
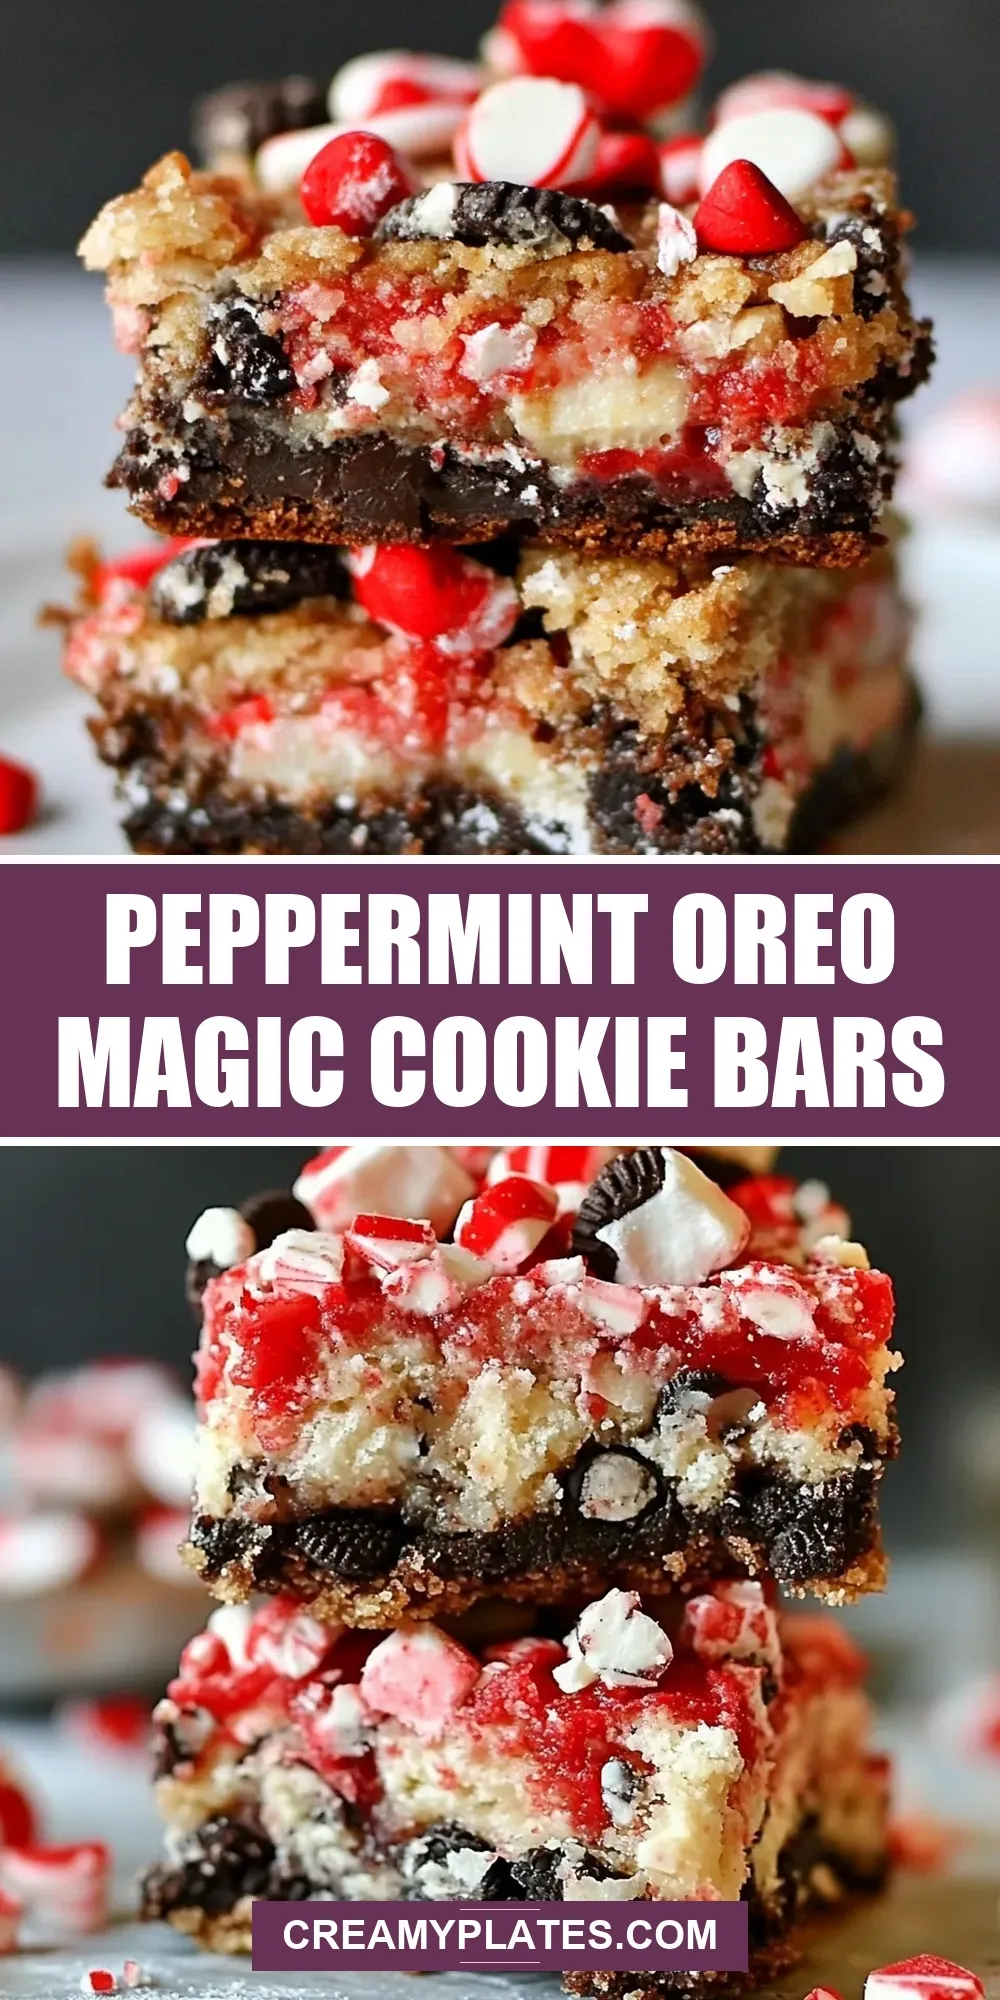
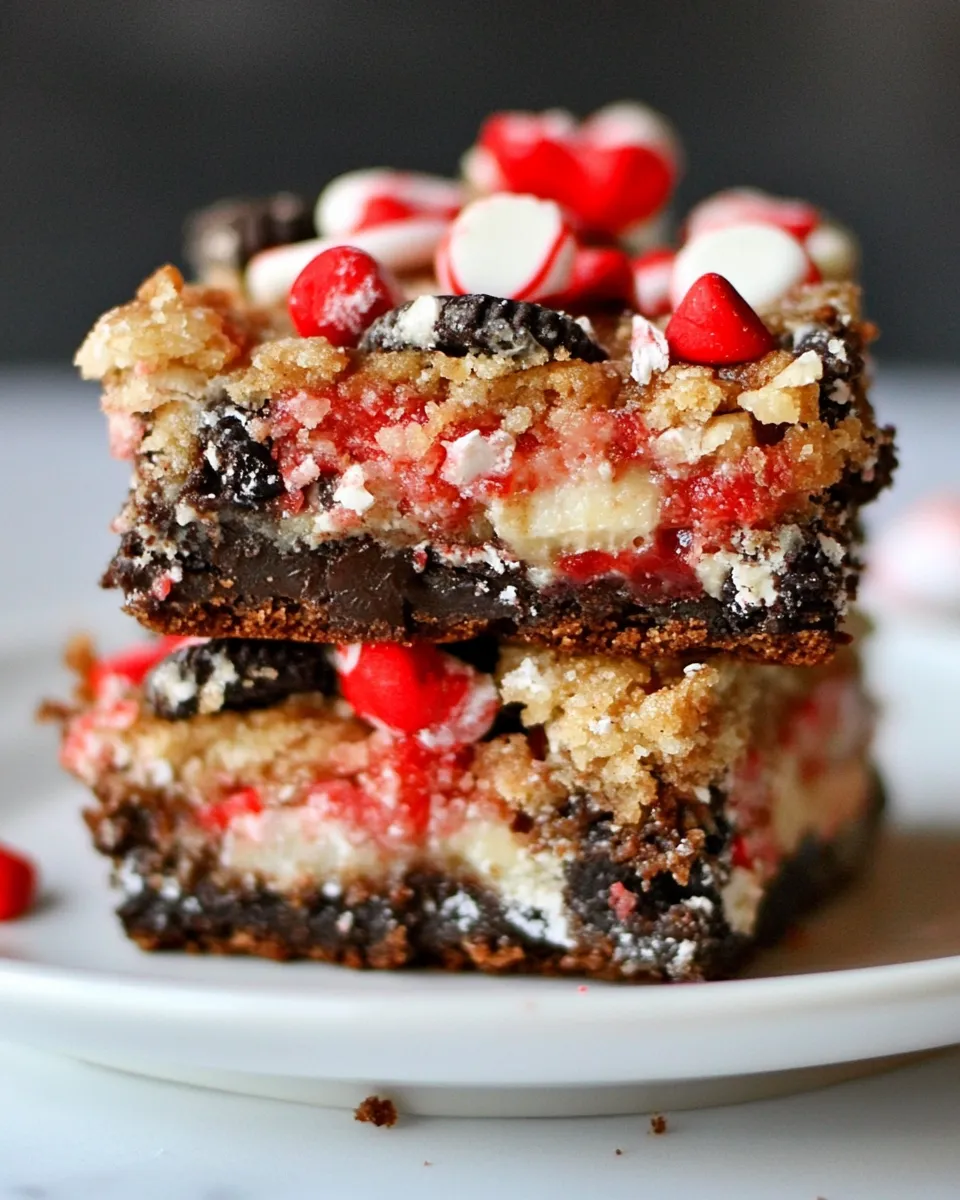
Peppermint Oreo Magic Cookie Bars
Get ready to indulge in a festive treat that combines the rich flavors of chocolate, peppermint, and coconut into a heavenly dessert. These Peppermint Oreo Magic Cookie Bars are the perfect way to celebrate the holiday season or simply satisfy your sweet tooth any time of the year. With layers of crunchy Oreos, creamy chocolate, and a hint of peppermint, these bars will have everyone asking for seconds.
Imagine biting into a soft, chewy bar, with the crunch of Oreos and the refreshing taste of peppermint dancing on your palate. Whether you’re hosting a holiday gathering or just looking for a sweet treat to share with friends, these magic cookie bars are sure to impress.
Why Cooks Rave About It
There’s something truly magical about cookie bars, especially when they are packed with layers of flavor and texture. Cooks rave about Peppermint Oreo Magic Cookie Bars for several reasons:
– **Simplicity**: This recipe is straightforward and doesn’t require any complicated techniques.
– **Versatility**: You can easily swap out ingredients based on what you have on hand or personal preferences.
– **Flavor Explosion**: The combination of chocolate, peppermint, and coconut offers a delightful mix that keeps everyone coming back for more.
– **Crowd-Pleaser**: These bars are perfect for parties, holiday celebrations, or even just as an everyday treat.
The Ingredient Lineup
To whip up these delicious Peppermint Oreo Magic Cookie Bars, gather the following ingredients:
- 1/2 cup melted butter
- 1 (14 ounce) can sweetened condensed milk
- 1 and 1/2 cups Oreo crumbs (Peppermint or candy cane Oreos work great)
- 10 additional Oreos for topping
- 1/2 cup chocolate chips
- 1 cup Peppermint M&M’s or regular M&Ms
- 1/2 cup Andes Peppermint Crunch baking bits or other peppermint bark chunks or white chocolate
- 1 and 1/2 cups flaked coconut
Equipment at a Glance
You’ll need a few simple tools to make these magic cookie bars:
- 9×13 inch baking pan: Perfect for holding all those delicious layers.
- Mixing bowls: For combining your ingredients.
- Spatula: To spread the layers evenly.
- Oven: To bake your bars to perfection.
Step-by-Step: Peppermint Oreo Magic Cookie Bars
Follow these easy steps to create your very own Peppermint Oreo Magic Cookie Bars:
Step 1: Preheat the Oven
Begin by preheating your oven to 350°F (175°C). This ensures that your bars bake evenly.
Step 2: Prepare the Baking Pan
Grease your 9×13 inch baking pan lightly with non-stick spray or line it with parchment paper for easy removal.
Step 3: Mix the Base
In a large mixing bowl, combine the melted butter, Oreo crumbs, and half of the sweetened condensed milk (about 7 ounces). Mix until the crumbs are fully coated and the mixture resembles wet sand.
Step 4: Press the Crust
Pour the crumb mixture into the prepared baking pan. Using a spatula, press the mixture firmly into an even layer at the bottom of the pan.
Step 5: Add the Layers
Sprinkle the flaked coconut over the crust, followed by the chocolate chips, Peppermint M&M’s, and Andes Peppermint Crunch baking bits. Drizzle the remaining sweetened condensed milk over the top.
Step 6: Top with Oreos
Crush the additional 10 Oreos and sprinkle them evenly over the top of your layered ingredients. This will add an extra crunch and flavor.
Step 7: Bake
Place the baking pan in the preheated oven. Bake for 25-30 minutes, or until the edges are golden and the center is set.
Step 8: Cool and Cut
Once baked, remove the pan from the oven and let it cool completely on a wire rack. Once cool, cut into squares and serve.
Seasonal Spins
These Peppermint Oreo Magic Cookie Bars are perfect as is, but you can easily adapt them for different seasons or occasions:
- Spring/Summer: Substitute the peppermint ingredients with fresh fruit like strawberries and use vanilla wafers instead of Oreos.
- Fall: Add pumpkin spice to the layers and use gingerbread cookies for a seasonal twist.
- Chocolate Lovers: Swap out the peppermint M&M’s for double chocolate chips to create a rich chocolate bar.
- Nutty Flavor: Incorporate chopped nuts such as pecans or walnuts for added crunch and flavor.
Problems & Prevention
Even the best recipes can run into issues. Here are some common problems and how to avoid them:
- Bars are too crumbly: Ensure you press the crust firmly into the pan and let them cool completely before cutting.
- Too sweet: If you find the bars overly sweet, reduce the amount of sweetened condensed milk by a tablespoon or two.
- Burnt edges: Keep an eye on your bars as they bake, and if the edges start to brown too quickly, cover them with aluminum foil.
- Sticking to the pan: Always grease your pan or use parchment paper for easy removal.
Shelf Life & Storage
To keep your Peppermint Oreo Magic Cookie Bars fresh:
Store them in an airtight container at room temperature for up to 5 days. If you want to keep them longer, they can be frozen for up to 3 months. Just make sure to wrap them tightly in plastic wrap and place them in a freezer-safe container. When you’re ready to enjoy them again, simply thaw at room temperature for a few hours.
Reader Q&A
Can I use regular Oreos instead of Peppermint Oreos?
Absolutely! Regular Oreos will work perfectly in this recipe. You can also experiment with other flavored sandwich cookies for a unique twist.
Can I make these bars ahead of time?
Yes! These bars can be made a day or two in advance. Just store them in an airtight container until you’re ready to serve.
What other toppings can I use?
You can customize the toppings to your liking! Consider adding chopped nuts, different types of chocolate, or even drizzles of caramel or peanut butter for extra flavor.
Can I make these bars gluten-free?
Yes! Use gluten-free Oreos and ensure that all other ingredients are gluten-free to make these bars suitable for a gluten-free diet.
If you love these , you might also enjoy:
See You at the Table
Now that you have the recipe for these delectable Peppermint Oreo Magic Cookie Bars, it’s time to gather your friends and family around the table. Whether you’re celebrating the holiday season or just enjoying a sweet treat on a regular day, these bars are sure to bring smiles and satisfaction.
With their rich flavors and delightful textures, they will undoubtedly become a favorite in your household. So grab your ingredients, preheat that oven, and let the magic begin!
Share on Pinterest
Peppermint Oreo Magic Cookie Bars
Ingredients
Equipment
Method
- Step 1: Preheat the oven to 350°F (175°C) to ensure even baking.
- Step 2: Grease a 9x13 inch baking pan lightly with non-stick spray or line it with parchment paper.
- Step 3: In a large mixing bowl, combine the melted butter, Oreo crumbs, and half of the sweetened condensed milk (about 7 ounces). Mix until coated.
- Step 4: Press the crumb mixture firmly into an even layer at the bottom of the pan.
- Step 5: Sprinkle the coconut, chocolate chips, Peppermint M&M's, and Andes Peppermint Crunch over the crust. Drizzle remaining sweetened condensed milk on top.
- Step 6: Crush the additional 10 Oreos and sprinkle them over the top of the layered ingredients.
- Step 7: Bake for 25-30 minutes, or until the edges are golden and the center is set.
- Step 8: Let cool completely on a wire rack, then cut into squares and serve.
Notes
- Store in an airtight container at room temperature for up to 5 days.
- Freeze for up to 3 months, wrapped tightly in plastic wrap.
- Substitute ingredients based on availability for unique twists.